Showing posts with label dessert recipe. Show all posts

Sunday, September 28, 2014

What's Cooking? Basundi, The Gujarati Classic Slow Cooked Dessert.

    
   Dealing with the new house and a whole bunch of other stuff I'll get into later has been a lot of work. Last week finally, the last of the boxes left the living room and we started to get an idea of just what goes where, and also what that "what" should be. There's also the issue of how the house works with people besides ourselves in it. One of the things that appealed to us about the place was how it would work for entertaining. The way we designed the place was with friends and family in mind and we were eager to take it for a small test spin. Each weekend we've been having a few friends over to see how everything works.
 
   One of the major changes has been in the dining room table. Instead of the long  reclaimed barnwood table we had, (now out on the deck) there is a new hammered copper dining room table, square shaped that seats 8 or 10.

Turns out people like that shape better than hollering down a long table. But what to put on that table? Last weekend moving with baby steps we had a few people over for dessert. After 3 months away from them I wanted to get my mitts on my clay pots again.

  
What better way to break in the table and re-christen one of my clay pots then with famed Gujarati chef Tarla Dalals recipe for the slow cooked milk pudding known as  Basundi.

    Basundi and variations of it are found all over India. The best way to think about it is as a slow cooked rice pudding.... without the rice. It's one of the easiest recipes you'll find anywhere. With just a few ingredients it's simple in preparation. The thing that makes Basundi special is that it's true slow cooking. With a little bit of effort and bit more investment of time, you can easily make this Indian classic. With the weather starting to change around here, it's the perfect dessert to make on a cool and rainy fall afternoon.

Basundi

Here's What You Need:
2 litres of milk (full fat)
1 cup of sugar
1/2 tsp ground cardamom
1/4 cup chopped pistachio
1/4 cup slivered almonds
1/2 tsp saffron

Here's What To Do:
Pour the milk into a wide bottomed pot, or a clay pot.


Turn the flame up.


 Bring the milk to a boil.


When it boils turn the heat down to low and cook it until the volume is halved. Keep a spoon nearby and stir the milk occasionally so nothing sticks.


If you're using a clay pot, always use a silicone or wooden spoon to keep from damaging the clay.
When the milk is reduced by half you're ready for the next step.
Add in the sugar.


Keep cooking it on a low flame and keep stirring until the milk starts to thicken.

Remember to scrape down the sides of the pan as you stir to prevent sticking, scalding, or burning. This should take about 25 minutes.
When the milk has thickened, add in the ground cardamom.


Stir the cardamom in well. Keep cooking and stirring for another 20 minutes.


When the basundi has thickened, it's ready to serve. You can serve it warm or let it chill a while and serve it cold as I did.
To chill it, take it off the flame and let it cool a bit.


When it's cooled enough, pop it in the fridge until you're ready to serve it.
Before serving, toast the saffron in a small cast iron pan, then crumble it.
Set it aside.
Chop the pistachios.

Ladle the Basundi into small serving cups. I used katoris.


Crumble a bit of the toasted saffron on top of each serving, followed by a bit of chopped pistachios, and a few slivered almonds.


 Serve it up.


I served it with a hot unsweetened spiced tea. Basundi is thick and rich so you don't need large servings to satisfy.  This recipe made 8 servings.

 
   It felt great to get back behind the stove working the clay pots again. Now that I have them out of their boxes, and safely stowed in the kitchen it's time to break out the dal. Fall's a coming as is my first crop of pineapple guava.


A spicy sorbet, or a chutney, I haven't quite decided. Follow along on Twitter @kathygori

Sunday, July 21, 2013

Have A Cool Cool Castello Moment With Hirten Cheese Ice Cream and Stout Caramel

Disclosure notice: I was provided with free product by Castello cheese for the purpose of writing this post.  All opinions stated within are my own.

   Last time I checked in, I was armpit deep in some of the best cheeses I'd ever tasted thanks to the nice guys at Castello Cheese who sent me their Alps Collection to experiment with.


It was way too much and too delicious to just squat and gobble on my own so... I threw a CheeseFest.


   We busted out all sorts of goodies for CheeseFest and of course the centerpiece of the buffet was a stellar mac 'n' cheese made with a combo of their Weissbeir and Classic cheeses. But all good things must end and parties are no exception. Every good party needs to go out with a bang and so I cooked up a few desserts. I needed things that would match up well with the cheeses I was serving, and figs and walnuts are a great compliment to the Pecorino-like qualities of the Hirten Cheese I served. So, I baked a Gluten Free Fig and Walnut Tart and served it with ice cream,  a Hirten Cheese Ice Cream to be exact.

  Now, I've had a few go rounds with cheese ice creams. I made a Pecorino Cheese ice cream a few years back... don't ask. It wasn't my proudest moment. When I saw that the Hirten Cheese was very much like a great Pecorino or an aged Gouda, I thought, what the hell, time to try the old cheese ice cream trick again. Those who ignore history are doomed to repeat it, or so the saying goes. I don't think that applies to ice cream though because this time... it worked.
 
   I did some research before I tossed this stuff in the ice cream machine, and it turns out that cheese ice cream is not something that just fell off the foodie fad truck, cheese ice cream is the oldest of old school. In fact this recipe goes back to 1760 and a book called The Compleat Confectioner. The original recipe uses Parmesan, but Hirten worked like it was made for it. Since one of our guests had a nut allergy and couldn't have any of the tart, I decided to make a caramel sauce for the ice cream, a stout caramel sauce, to be exact since every cheese genius said that nothing works with Hirten cheese like a good stout.

Hirten Cheese Ice Cream With Stout Caramel Sauce


Here's What You Need:

Ice Cream 
1 cup of milk
1 cup of whipping cream
1/3 cup sugar
3 large beaten eggs
pinch of salt
3 oz  grated Hirten cheese

Stout Caramel
1  12 oz bottle of stout
2 Tbs unsalted butter
1 and 1/2 cups dark brown sugar
1 cup of whipping cream
1 tsp vanilla extract
1/8 tsp of salt

Here's What To Do:

Whisk together 3 large eggs in a big bowl and set it aside.
Measure and weigh out 3 oz of Hirten cheese


Chop it finely and set aside.


Mix together the milk, cream and sugar until they're nearly at the boil.
Whisk a bit of the eggs into the hot milk, cream and sugar mixture SLOWLY,  and a bit at a time.


This is so you don't wind up with Hirten cheese scrambled eggs. Not that there's anything wrong with that, but it doesn't make for a great dessert if ice cream is what you're after.
Now it's time to stir the Hirten cheese into the egg, milk, cream and sugar mixture.


Whisk it until it's smooth. Do not let it boil.
Now, here's the twist. This is the time when most people take their cheese ice cream and pour it through a strainer to get our any crystals. However, when working with a fine cheese like Hirten or an aged Gouda, I find that the little bits of crystal in the cheese are just fine in the ice cream and in fact add to the flavor.


Chill the mixture for a bit in the fridge until it's nice and cold.
Pour it into your ice cream machine and churn for about 25 to 30 minutes or until it's nice and firm.


Put it into the freezer until you're ready to serve.
Now while that's chilling, time to make The Stout Caramel.
Start with a good bottle of Stout. I used Old Rasputin.


Pour the Stout into a pan and simmer it on the stove for about 10 minutes.


Stir it every once and a while while it's cooking down.
Add in the butter

And the brown sugar.


Cook everything for about 12 minutes. Don't stir it!


When it reaches 225 degrees on the candy thermometer and turns syrupy,  it's done.
Take the pot off the heat.
Add the whipping cream, salt and vanilla . Keep stirring as you do this so nothing curdles.


Put the pan back on the stove.
Turn down the heat to medium and cook for another few minutes until the caramel turns thick and creamy. Look for it to coat the back of a spoon.


Serve it up. Drizzle it over the Hirten cheese ice cream.


   There it is. Your cheese course, your after dinner stout and dessert all in one bowl. This stout caramel is also great over vanilla ice cream and if you really want something special, try it over Chocolate Olive Oil Ice Cream  made with Olive oil chocolate from CocoaPlanet.

   Coming up next , some easy trick for Summer Parties and Indian Style Baby Turnips. Follow along on Twitter @kathygori

Win a Private Cheese Tasting in your own home - enter by clicking on the banner below. Castello Moments and this post is a collaboration between the blogger and Arla Foods USA.  
Win Castello Cheese Tasting

Saturday, October 27, 2012

A Last Minute Save. The Hail Mary Almond Torte


   While working on the James Beard dinner with St. Martins' Press and California Olive Ranch Olive Oil, the one thing that I kept worrying about was dessert. My mission was to recreate James Beard's recipes using California Olive Ranch oil, all the while adding my own Indian twist. The dinner could be worked with. The dessert was another matter all together. For dessert, there could be no tinkering around... well, maybe just around the edges, an Indian twist here and there. With that in mind I went searching through my battered, falling apart James Beard Cookbook looking for something to suit.

   I poked through pies and creams, custards and ices, cookies, tarts, bombes, souffles and cakes until I finally found something I thought I could manage and add to. Almond Torte. What was it that hooked me about that particular dessert? The springform pan. I happen to have three of them and rarely use them. Why did I buy them? Well, I love tricky equipment when experimenting with food, the more complicated the better. I know there's no big whoop about baking with a springform pan for most people, but for me it's the equivalent of one of those MI6 guys showing James Bond some cool new piece of equipment you just know is going to be used against Penny Serenade or Thunder Pussy or someone like that in the third act.


   So there I was, cruising for a use for one of my spring form pans plus a partner for the pistachio saffron ice cream I'd made and I quickly found one.


Almond Torte


Here's What You Need:

6 eggs, separated
1 cup of sugar
3 Tbs of orange juice
1 tsp of orange rind
1 tsp of cinnamon
1 cup of unbleached almonds ground in a blender or grater
1/2 cup of toasted white breadcrumbs
1/2 tsp of almond extract
1/2 tsp of cream of tartar
1/4 tsp of salt.
1 cup of whipped cream
 ice cream

Here's What To Do:

Preheat the oven to 350 degrees.
Lightly grease the bottom of an 8 or 9 inch springform pan.
Separate the eggs.


Beat the yolks in a mixing bowl until they're nice and light gradually adding 1/2 cup of sugar.


Beat in the orange juice, orange zest,and cinnamon.


Fold in the ground almonds and the toasted breadcrumbs.


Fold in the almond extract. Set aside.
Beat the egg whites until they are foamy.
Beat in the cream of tartar and salt.
Keep beating, adding the other 1/2 cup of sugar gradually until it forms stiff peaks.


Fold in the yolk and almond mixture just enough to combine them well.


Pour the mixture into the springform pan.
Bake in a 350 degree oven for 50 to 60 minutes or until the cake pulls away from the pan.

Okay, so far so good, right? Not quite. The cake deflates a bit of course, but when it comes to unmolding from the springform pan, this is what happened.

    
   Not so pretty. I have unmolded things before and I've never baked anything in a springform pan without greasing it or lining it with parchment paper. But who am I to question James Beard???? The man says just grease the bottom, I just grease the bottom. So there I was with a sunken cake, a quart of pistachio, saffron, ice cream and the ticking clock. What to do?

    I was all set to toss the cake in the garbage when Alan broke off a piece and ate it.
"You are not throwing this out!"

   "Yes, I am."

   "Step away from the garbage and put down that cake!"

   "How the hell am I going to serve this? It's grinning at me like an open wound."

   "There must be something you can do. Can't you call your mother?"

   My Mother? Fran? That's the culinary equivalent of calling in Hervey Keitel from Pulp Fiction. I had no idea what she'd say. Turns out it was something like this. Put A Bird on it?


   "Cut it up and put some whipped cream on it. They'll never notice. It's what I always did." Now THAT explains a lot.

   Well, to prevent any kitchen dumpster diving, I did what she suggested. I broke up the cake and layered it at the bottom of wine glasses.
 On top of that I placed a layer of the pisctachio saffron ice cream
A bit more cake on top of that.
And a final layer of unsweetened whipped cream sprinkled with a bit of chipped pistachios.

    I don't quite know what to call this, a trifle, a parfait, a whatever? What I do know, is that it most definitely worked! Accompanied by a hot cup of chai, we had dessert  perfection. Coming up next a caramelized mango salad, and some more tricks with olive oil. Follow along on Twitter @kathygori

Wednesday, April 25, 2012

Easy Home Made Truffles, That's How I Roll. Plus A Giveway From OXO.


   Sometimes, the things that seem to be the most expensive and rare, turn out to be the simplest and easiest to make at home. Good quality ricotta, pickled and spiced cherries, artisan breads and truffles. Now, when I'm talking about truffles here, I'm not talking about those things that highly trained dogs and pigs unearth in the Perigord region of France, the hills of Tuscany, and the forests of Oregon. No, I'm talking about those chocolaty delights that can easily rock your wallet at 25 bucks for a half dozen.

   Good quality truffles no longer have to be a pricey extravagance as I recently discovered. In fact, making delicious truffles is probably one of the easiest things I've ever tried. If you've ever made a simple ganache frosting you're halfway there. All one needs for high class truffles is some good quality bittersweet chocolate, cream, and imagination. Also,  a recently discovered secret weapon a  digital scale.


    I'm known among my friends for going as old school as possible most of the time. I cook in clay, I hand grind spices when I can, and if something can possibly be done the hard way, that's usually the way I choose. For years I've heard people sing the praises of having a kitchen scale. My friends who do molecular gastronomy swear by them. However, I am of the "handful and pinch" tradition. This, I discovered doesn't always work well.

   For instance, when Paula Wolfert included on of my recipes in her  book Mediterranean Clay Pot Cooking  just saying a  fistful of something didn't fly. I had to be precise. I bought a scale. But not a very good scale as it turned out. I was scale challenged. Then one day I received a 5 lb digital scale from the people at OXO. They also sent me an extra scale to share with someone. Game on. I had to find something to make that needed some precise measurements. It was just the excuse I needed to try my hand at making truffles.


Chocolate Truffles


Here's What You Need:

1 cup of organic cream
4 oz of good quality semisweet or bittersweet chocolate. I use either Valrhona or Callebaut
8  green cardamom pods
1 pinch of cardamom
1 cup of good quality  unsweetened cocoa powder

Here's What To Do:

Pour 1 cup of cream into a pot.


Crush the cardamom pods.


Remove the seeds and put them into the cream.


Turn up the heat to medium and bring the cream to a boil. When it starts to boil put a lid on the pot, take it off the heat and let the cream steep for 30 minutes so that the cardamom becomes infused in it.
Weigh the chocolate. You need 4 ozs. Then chop the chocolate into pieces. Set it aside.


After the cream has steeped for a half hour, strain the cardamom seeds out of it and put it back into the pot. Reheat it slowly.
Do NOT let it boil.
Meanwhile in a double boiler, melt the chocolate.
When the cream is hot but not boiling, pour the melted chocolate into it.


Take it off the heat, and mix everything together well.
Set it aside.


After it cools a bit, place the mixture in the refrigerator to firm up for a while. Chill it for at least 2 hours, or until you can easily roll teaspoons of it into a ball.
Place a piece of waxed paper on a cookie sheet.
Scoop teaspoons of firmed-up chocolate ganache out of the pot and roll it into balls.
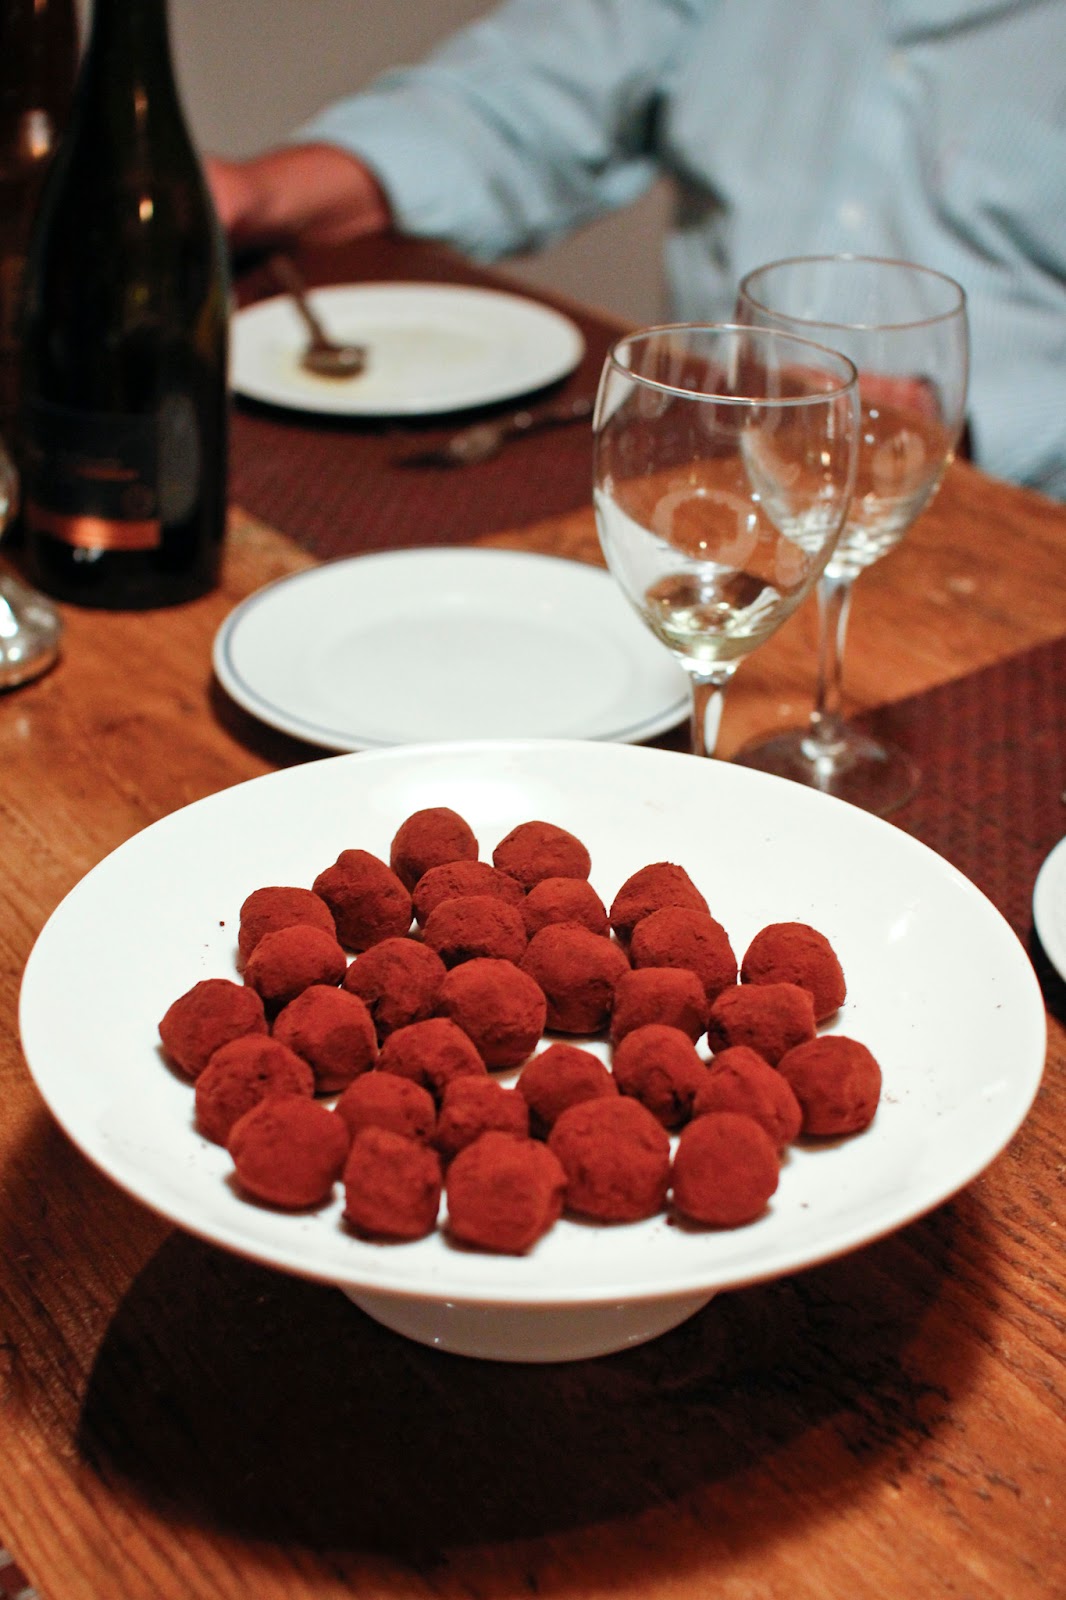
Dip the balls into 1 cup of unsweetened cocoa powder.


Roll the cocoa coated bits into balls


Set the balls down on the waxed paper.
Place the cookie sheet with the fresh truffles into the fridge to chill further.


When they're well chilled, put them into an airtight container until you wish to serve them.


They're damn delicious and this recipe makes about 3 dozen truffles. Of course if you make them larger, you'll have fewer truffles.

   When I mentioned that one can use one's imagination in truffle-making, besides making cardamom truffles I made a second batch of Kaffir lime truffles. This involved adding 3 Kaffir lime leaves and the zest of 1 lime to the cream instead of adding cardamom, then straining it out after steeping.

   If you'd like to try your hand at truffles, or anything else requiring accurate measuring, the folks at OXO have given me one of these great digital scales to share. They're easy to operate, measure in ozs or kgs  and have a pull-out display feature for easy reading. They've totally changed my mind about the whole scale thing.

    If you'd like a shot  getting this great OXO scale  here's what to do.

Leave me a comment about what you'll do with this great digital scale from OXO
For extra chances:
Follow me on Twitter @kathygori
Follow OXO on Twitter @OXO
Like The Colors Of Indian Cooking on Facebook
Let me know in comments if you do any of these things.
The winner will be drawn by Random.org on Saturday May, 5th
Because of shipping issues unfortunately only residents of the USA are eligible for this contest.

  
I want to thank the people at OXO for giving me the opportunity to try out this great product. Over the years I've purchased a lot of their products , but it's always a trip to discover that something you never thought you needed, could turn out to be a kitchen necessity!


Coming up next meet Jessica Rabbits even sexier cousin, Bunny Brulee!  Follow along on Twitter @kathygori

LinkWithin

Blog Widget by LinkWithin