Showing posts with label dessert. Show all posts

Monday, January 22, 2018

A Tasty and Easy Company Dessert For Holiday Recovery. Panna Cotta.

   
   This weekend I cooked the first real meal since I got sick on New Years day. Alans' cousin Joan came up from Berkeley for a visit and I prepared an easy old school Italian dinner. Lobster and saffron risotto, a blood orange salad with Sicilian olives, and for dessert, Vanilla Panna Cotta with a Raspberry Coulis, and some Pistachio Sea Salt Brittle.

   It has been a while since I've made Panna Cotta and so looking through my recipes, I decided to go with something from a friend. I've known Judy Witts Francini aka Divina Cucina for a few years and have always enjoyed cooking her recipes. She's a wonderful chef who happens to live in the same town as some of my Italian relatives, and a number of dishes I've gotten from her are now in my regular at home meal rotation. The Panna Cotta has just joined the list.
 
   I didn't get a chance to photograph the making of this dessert and I just have a leftover to show you as this stuff disappears fast once it's on the table. It's very simple to make so the instructions are as follows, I'm linking my pistachio brittle recipe here, and the raspberry coulis at the end, so here goes.


Vanilla Panna Cotta

Here's What You Need:
4 cups of heavy whipping cream
1/2 cup caster sugar
2 tsp vanilla extract
4 tsp powdered unflavored gelatin
6 Tbs ice cold water


Here's What To Do:

Heat the heavy cream and sugar in a small pot. Once the sugar is dissolved, remove from heat and stir in the vanilla extract.

Sprinkle the gelatin over the cold water in a medium-sized bowl and let stand 5 to 10 minutes.

Pour the very warm Panna Cotta mixture over the gelatin and stir well until the gelatin is completely dissolved and blended into the cream

Divide the Panna Cotta mixture into lightly oiled (with a flavorless neutral tasting oil) custard cups, or you might do as I did and pour them directly into a wine or dessert glass or cup avoiding unmolding. 

Chill them until firm, which will take at least two to four hours. 

When they are firm, unmold them or serve them straight up in the glass you've poured them into .


Raspberry Coulis

Here's What You Need:
One  6 oz carton of fresh raspberries
1/4 cup caster sugar
1 and 1/2 Tbs water


Here's What To Do: 

Place the water and sugar in a small pot over medium heat. Stir it from time to time, until the sugar dissolves, about 3 minutes or so.

Put the raspberries and the sugar syrup in a blender and puree, or do as I did and use an immersion blender. Mix them together right int the pot.

Strain the raspberry puree  through a fine sieve to remove the seeds. You are good to go.

Drizzle some of the raspberry coulis over the  Panna Cotta, sprinkle a bit of finely chopped pistachio nut over it and then break off a piece of pistachio brittle and add it as a finishing touch.


   Easy and delicious, the perfect dessert for getting back to cooking again. Coming up next, more dishes for the season, follow along on Twitter @kathygori

Tuesday, August 29, 2017

Watermelon Granita. Got a Blender or Food Processor? You can Make This Easy.


 Since it's been in the 100s up here in Sonoma this last week with 105 expected for Labor Day..it's not exactly cooking weather. So I decided to bring back an Oldie But Goodie which is a perfect cooling dish for any holiday festivities you may have planned. I made this just last week for the CocoaPlanet gang and it was such a hit I bought another watermelon to make one for the gang at home.....so return with me now to the days of yesteryear...back back to 2012 and Watermelon Granita.


This all started when I bought a watermelon for a Labor Day Barbeque at our house. I'd had so much fun making Watermelon Mousse that I decided what this house needs is more watermelon!! I was catching the tail end of the season here for good local watermelon but I secured one and decided that I'd make the watermelon mousse again for our Labor Day guests, but then I got lazy, one thing led to another and I decided on my crowdpleasereverybodysfiveagain desert for holiday cook outs, homemade vanilla ice cream and boxes of various types of cones. Make your own ice cream cone with sprinkles or... whatever. It always works and it's always fun to see people revert, and yet I had this watermelon just sitting there taking up space in the fridge. What to do?

   I decided to juice it. A bunch of friends have recently gotten themselves fancy juicers and blenders but I've still got my trusty old Oster. No fancy bells and whistles but it works. I chunked the watermelon into the blender and  juiced it. I mixed it with some iced green tea, fizzy water, a dash of lime juice and chia seeds. I figured that everybody would be hitting the beer and I'd be the only one drinking my watermelon concoction. Boy was I wrong. I barely got any. They liked it that much. I did what any other normal person would do. I bought more watermelon and juiced it. So there I was with a pitcher full of watermelon juice and nowhere to go. There had to be something else I could do with this stuff. Something like say.....granita?

   Granita, the perfect lazy individuals dessert. Pour stuff in the freezer and stir it with a fork every now and then. It does not get very much easier than that. Want this? Grab your watermelons and you can be enjoying this within a couple of hours.

Watermelon Granita


Here's What You Need:

1 seedless watermelon
a 13 x 12 glass baking dish..or smaller if you wish
1 Tbs of sugar

Here's What To Do:

Chunk the watermelon and blend it to juice in a blender or food processor.
Pour it into the baking dish.
Stir in 1 Tbs of sugar. I do this because I want to  keep the juice from freezing into a solid mass and sugar helps prevent that.
Rake the mixture with a fork after 30  minutes breaking the juice up into icy crystals. Keep doing this at 30 minute intervals for about 2 hours or until it's icy enough to scoop into a bowl.

   While I was waiting for my juice to freeze, I was wondering just what I could do to zip things up a bit. I figured that a lot of people (okay my family) has always sprinkled their watermelon with salt. But I didn't just want any salt. How about smoked salt? How about full on barbeque mesquite smoked salt?? Why not? Couldn't hurt. So I smoked some salt in a stove top smoker. It took 20 minutes.

 
   Light, refreshing, and above all easy, I dished up the combo of watermelon granita with a smokey dash of mesquite. Did it work? Yeah, it worked. For real.  More cool dishes for hot weather coming...meanwhile follow along on Twitter @kathygori

Friday, February 17, 2017

Take Advantage of Winter Fruit, Crumble Baby, Crumble.


   It all started with V-Day. I cannot stand forced holidays; I consider Valentines and New Years Eve to be two of those for starters. Don't get me wrong. I love a good time. I just don't like it when society makes me feel compelled to have a good time. I hate the Death Race 2017 type running for restaurant reservations, the right table, (hell any table) at the right time (dinner at 10:30? I think not) or even finding a place in our small town that isn't already booked waaaaay up. You see one of the side effects of living in a tourist town is not only does one have to worry about how to spend ones' holiday, one also has to worry about all the other people who have flooded into town to spend their holiday in Wine Country. There's nothing romantic about trying to choke down a prixe fixe meal while all the other celebrants who are waiting for you to finish, stand and stare and shift their weight around and sigh.

   So, about two years ago we decided the heck with that. We'll dine in for Valentines Day. I'll cook something special, we'll watch a movie that's the way to go. So we did that and it was soooooo much more relaxing, that it's now how we like to roll on those Must Celebrate Holidays. This year I had no trouble figuring out the appetizer and entree course, salad is salad but what for dessert?

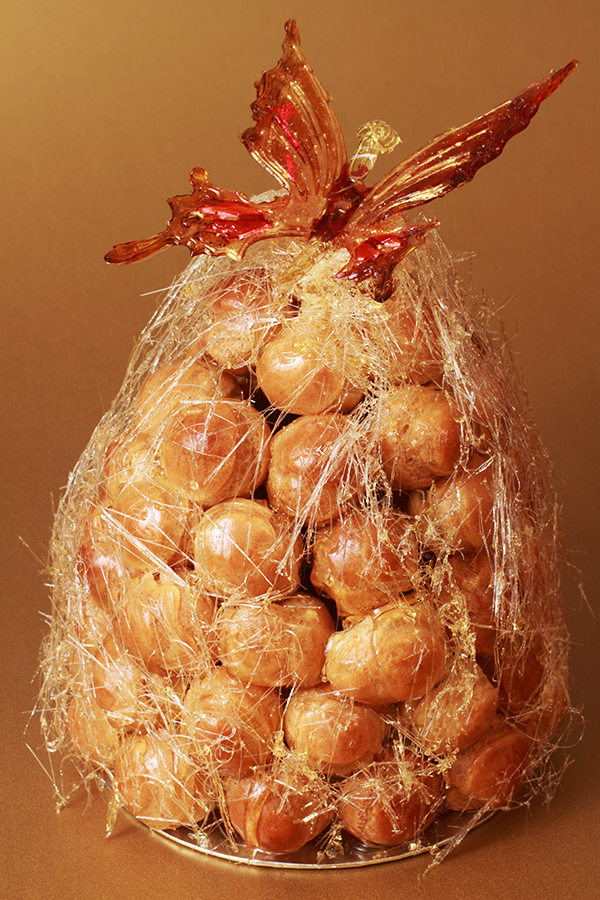
   Since I've been working helping develop the menu for CocoaPlanet I've been cooking up a storm and now have a large collection of potential desserts to draw on. I wanted something warm and homey and also simple. We've been working hard around here the last couple of months, and finally have the pilot script done, turned into the producers and director and out of our hair... for now. I'm also nearly recovered from the surgery I had a couple of weeks ago as soon as the script was finished... so even thought I wanted to, I wasn't about to make a Croque Embouche.


After all, I'm not that nuts! I decided to make the perfect homey sort of dessert. The dessert that Alan loves to order any time he finds it on a menu, a Winter Fruit Crumble. Simple , tasty, and it bakes in the oven while the main course is being eaten. Can't beat that. If you have any bags of frozen cranberries left hanging around from Christmas or Thanksgiving...now's the time to look like a smarty pants and use them. Otherwise, grab some apples, pears, berries and you've got a party, a crumble party.

Winter Fruit Crumble


Here's What You Need: 
1 cups frozen cranberries
1 cup fresh blueberries
2 Braeburn apples (or any other seasonal apple) peeled, cored, and cut into pieces
2 Bartlett pears peeled,cored, and cut into pieces
3/4 tsp vanilla extract
1 /2 cup sugar
1 and 1/2 Tbs cornstarch

For The Topping:
1 cup rolled oats (not instant)
1/2 cup flour (regular or gluten free)
1/4 tsp salt
1 stick unsalted butter softened
1/2 cup sugar


Here's What To Do:
Preheat the oven to 425 degrees.
Mix the fruit together.


Add in the sugar and cornstarch.


Stir everything around coating the fruit well.


Grease individual ramekins or one 2 quart baking dish with butter.


Put the fruit into the ramekins or baking dish.


I halved this recipe since it was just the two of us.


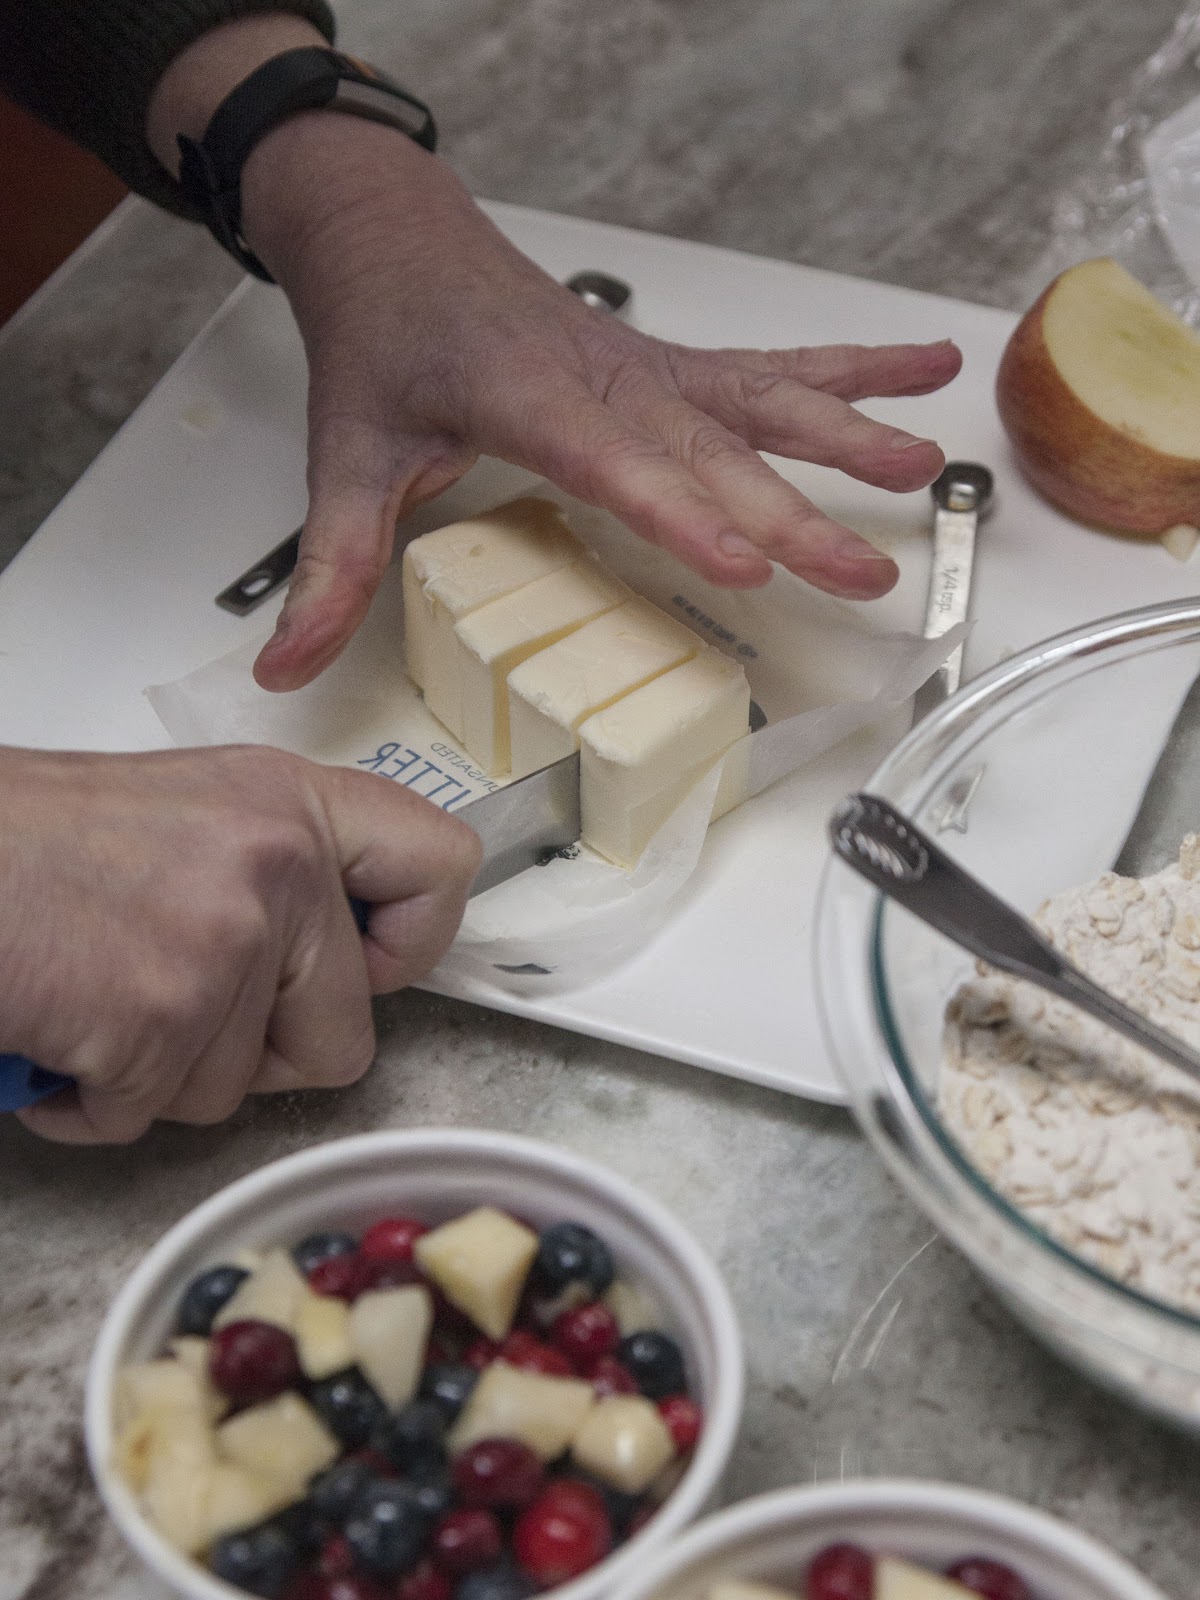
Now for the topping, cut the softened butter into bite sized pieces.


In a separate bowl mix together the rolled oats, the sugar, flour, and salt.
Crumble the butter pieces into the rolled oats, flour, and sugar.


Mix it all together well into crumbly bits and sprinkle the crumbly topping onto the fruit tarts.


Place the baking dish or ramekins on a cookie sheet and place into the middle rack of the oven.


Bake for 25 minutes , or until the juices are bubbling and the top is golden. Let it cool for a bit before serving it up.
You can top it with whipped cream, creme fraiche, or since it was V-Day, I made some vanilla bean ice cream.


Dig in...and take your time. Savor and enjoy....no one is waiting for your table.


   Coming up next, back to seasonal Indian food, what grows around, gets served. Follow along on Twitter at @kathygori

Wednesday, February 8, 2017

Make it Easy Creme Brulee Plus Where I've Been

  
   The last few weeks have been relatively crazy, and I haven't done a lot  of (try any) cooking. The reason was I had some preventative surgery. Having had  breast cancer twice my doctors at UCSF and I decided to address the cancer my mom died of by taking a prophylactic measure...so know I've had the full Jolie....why don't I look like her??????
   
   After spending the bulk of the time resting, dealing with pain meds, recovering, and trying not to lift anything heavier than 20 pounds I finally got behind the stove again yesterday.  I wanted something sweet and easy to make. I'd been talking to Anne McKibben the owner and founder  of CocoaPlanet and it turns out we'd both been thinking of the same thing... why not add Creme Brulee to the dessert menu... both chocolate and vanilla. It sounded delicious and so I decided that for my first foray back into the kitchen I'd start with that, so yesterday I did.  I wanted something simple that didn't involve any standing around and that would be tasty with a minimum of sugar, and so this!

Creme Brulee


Here's What You Need: 
1 and 1/2 cups of whipping cream
1 pinch of salt
1 and 1/2 tsp vanilla extract
3 egg yolks
1/2 cup of powdered sugar
extra caster sugar for caramelizing the sugar crust

Here's What To Do:
Preheat the oven to 275 degrees.
In a large bowl mix together  the egg yolks and powdered sugar.


Blend them together until the mixture is thick and smooth.


Drizzle in a bit of the whipping cream to lighten and make the mixture smoother.


Then add the rest of the whipping cream in and blend it together well.
When that is done pour everything through a strainer into another bowl to filter out any egg or sugar chunks.


After you've done this, add in the vanilla.


Mix everything together well.
Prepare about three cups of boiling water.
When the creme brulee is ready pour in into low creme brulee dishes which you have set  into a larger Pyrex baking dish.


Set them in the oven and pour the boiling water into the larger baking dishes so that the creme brulee dishes have water up to the midway point. Try not to spill any water into the creme brulee dishes.


 close the oven door and bake for about 30 minutes.


It's done when the creme brulees are set. The center can have a bit of a jiggle but should NOT still be liquidy. If they are, bake them a bit longer.
Take the creme brulee dishes  out of the oven, and using a spatula carefully transfer them from the water bath to a cooling rack.
Let them cool for about 30 minutes then put them in the fridge to chill for a bit.
When you are ready to serve them, take them out and sprinkle a couple of tsps of caster sugar over the top.


Tilt the creme brulee dish a bit to make sure the sugar is evenly distributed.


Then using a culinary torch start melting and crisping the sugar.


When you are done..there should be a thin hard glass like crust on top of the brulees.


At this point they should be put back in the fridge again for a few minutes for firm up any of the custard that might have softened too much from the flame. But do NOT leave it in the fridge too long as that will soften the sugar crust... maybe about 5 to 10 minutes is ok.
Then, serve them up.


   Breaking through the crisp sugar top is always fun, letting you get at the creamy custard inside.
This recipe makes 4 creme brulees, just double it if you want more of them. This might be a great dessert to serve for Valentines day as it's sweet, but not too heavy.
   
   So yes, I had some creme brulee yesterday which put me well on the path to healing. Coming up next more easy Indian recipes with Winter Vegetables, and maybe another sweet treat for V-Day. Follow along on Twitter @kathygori

Thursday, December 8, 2016

Because I Could Not Stop For Death...I Baked Him This Gingerbread. Emily Dickinsons Killer Gingerbread.


   I love the poetry of Emily Dickinson, always have.  I studied her in school, read her works for my own pleasure, read her letters... (note to self: burn everything) but it wasn't until recently that I learned that during her life she was better known for her cooking and baking than she was for the written word. There was a recent  excellent essay in the New Yorker which explains a lot of the problems she had back in the day with the ways in which one got published, and how much control an author had oven her own works and how they were presented to the public. After reading it I realized that were she around today she'd probably have an artisanal bakery somewhere in Amherst with top Yelp ratings, and her hand written calligriphied poetry tucked inside each and every box of brownies or cake.

 Or maybe she'd just pull up stakes altogether and head on down to DUMBO and set up in a reconverted kosher pickle factory and be hipster Emily.


She'd hook up with these guys and share a space selling ten buck chocolate bars along with her baked goods.


Of course she'd let her brother Austin and his band come in and play on weekends while she delivered her weekly podcast.


Who knows? After all, she went to Mt. Holyoke.
  
   Either way once I discovered Emily's cooking and baking chops I absolutely got why she divided her day between the kitchen and her writing space. The simple answer as far as I'm concerned is instant gratification. When one writes, there's  many a wait between what goes on the page and anyone actually reading it. Having earned my living as a screenwriter for years makes that very clear. One writes a script, a book, a poem and then comes the rewriting, changes, tweaks, etc. before the finished product ever sees the light of day. If it sees the light of day, and if one is in the screenplay business, if one gets the final credit..or an un-credited rewrite. Whatever.

   Emily however didn't care a jot about any of that. She wrote her poems and after being fed up with publishers changes, and the general hurly-burly of being a woman in the world of 19th century letters, shoved it all in a drawer to be discovered after her death... meanwhile she built her reputation on her food, and a well deserved reputation it was.
   
   About a year ago I bought the Emily Dickinson cookbook from the Emily Dickinson museum, and one recipe in particular became a favorite, Emily Dickinson's Famous Gingerbread. I baked some this last summer for the first time, and enjoyed it so much that I decided to try a gluten free version for the menu at CocoaPlanet Tasting Room and Modern French Cafe. This gingerbread will be on the menu soon here in Sonoma.... and it can be made with either regular flour or gluten-free flour. So, if you 'd like a real old school mid 19th century gingerbread, no fooling around, try this with a dab of fresh whipped cream and a mug of hot cocoa. You won't be sorry.

Emily's Gingerbread


Here's What You Need:
 3 and 7/8 cups of flour (either all purpose or gluten free)
1 cup of mild molasses
1 stick of unsalted butter (measures out to 1/2 cup)
1/2 cup whipping cream
1 Tbs ground ginger
1 tsp baking soda
1 tsp salt

Here's What To Do:
In a large bowl mix together the flour...


...the ground ginger...


...baking soda and salt.


Make sure they're all well blended and set aside.
Pour the molasses into a measuring cup.


Remember what they always said about molasses in January??  Well that applies to December too.


You may need to sit down for this one. When the molasses is finally out of the bottle and in to the cup, place the room temperature butter in the bowl of a stand mixer, and using the paddle attachment beat on low until it's smooth and creamy.


In a separate bowl beat the whipping  cream until it starts to thicken but is not fully whipped. Add it to the butter in the stand mixer.


Mix them together on a low speed.
Now, add in the molasses...


...and wait for it....


Blend it all together. Make sure it's mixed together thoroughly.
Add the flour mixture in three batches, mixing it at a low speed.
When it's all blended together, pour the dough onto a length of Saran wrap.


Shape it into a rectangle. Smooth it out as best you can. If using gluten free flour dust it with a bit of tapioca flour, if using regular flour, just dust it with flour.


Flatten it into a rectangle about 1 inch or so thick and wrap it in Saran wrap.


Place it on a cookie sheet and shove it in the fridge overnight... you can refrigerate it for just an hour or so... but Emily preferred the slow cooking method and who am I to argue with a genius?


When you are ready to bake, preheat the oven to 350 degrees.
Line a rimmed baking sheet with parchment paper and place your dough on it. You can use a light dusting of flour to keep things from getting too sticky.


Roll the gingerbread dough out so it fills the rimmed baking sheet and pop it in the oven for about  20 to 25 minutes.


You'll know it's done when  the edges are browned and the center has firmed up a bit.
Take it out and cut the ginger bread into pieces and place them on a cooling rack.


Now for Emily's glaze.
Mix together 1/2 cup of powdered sugar and 1 Tbs water.


Whip it together until you have a thick icing.


Brush the icing on the cooled gingerbread tiles.


Wait for the icing to set and serve it up.


   If you aren't planning on enjoying it right away, don't worry. This will keep in an airtight container for about 2 weeks. This gingerbread is not puffy, this is the real deal early Americana stuff of legend. Serve it with some lightly sweetened or unsweetened freshly whipped cream, or leave it out for Santa. No matter what you've done this past year, this will change his mind.


Coming up next, I finally get around to kheema pav, the Mumbai street favorite...but this time with a local twist. Follow along on Twitter @kathygori

LinkWithin

Blog Widget by LinkWithin