Showing posts with label gluten free bread recipe. Show all posts

Thursday, December 12, 2013

Here's Where I Take Requests. Handvo, Gluten Free Gujarati Bread.

Handvo
   Here we are, deep in the heart of serious holiday eating, and since Thanksgiving waddled its way out the door I've hardly been in the kitchen. Not that there wasn't a whole helluva lot of cooking going on in that last week of November. There was. Our friend Irving and I whipped up meal after meal, but then once he'd made his way back down to LA, it was party party party. We celebrated our anniversary on Dec 9th. Prior to that we went to a Hanaukkah party, a couple of Christmas parties and had lunch with an old boarding school pal of Alan's who was visiting from the East. Besides that, there has been the continuous cleanup, paperwork, and organizing involved with settling my parents affairs. Needless to say there has not been a lot of cooking, or even eating in going on. Well, all that's about to change, things are about to get back to normal in my kitchen. I figured I'd start with a very unusual for me event. A request. 

   A few weeks ago I got an email from a reader asking me if I'd show him how to make Gujarati Handvo. Considering I've been going through a major Gujarati food crave ever since my trip to LA back in October, it's not such a weird request. I've been making Dhokla, and Khandvi, so why not Handvo? They're sort of the Big 3 of gluten-free Gujarati snack foods, and since a lot of my friends have gluten allergies what could be a more natural fit? We always do a lot of entertaining this time of year and I love serving stuff that not only my gluten free guests, but everyone can enjoy.
  
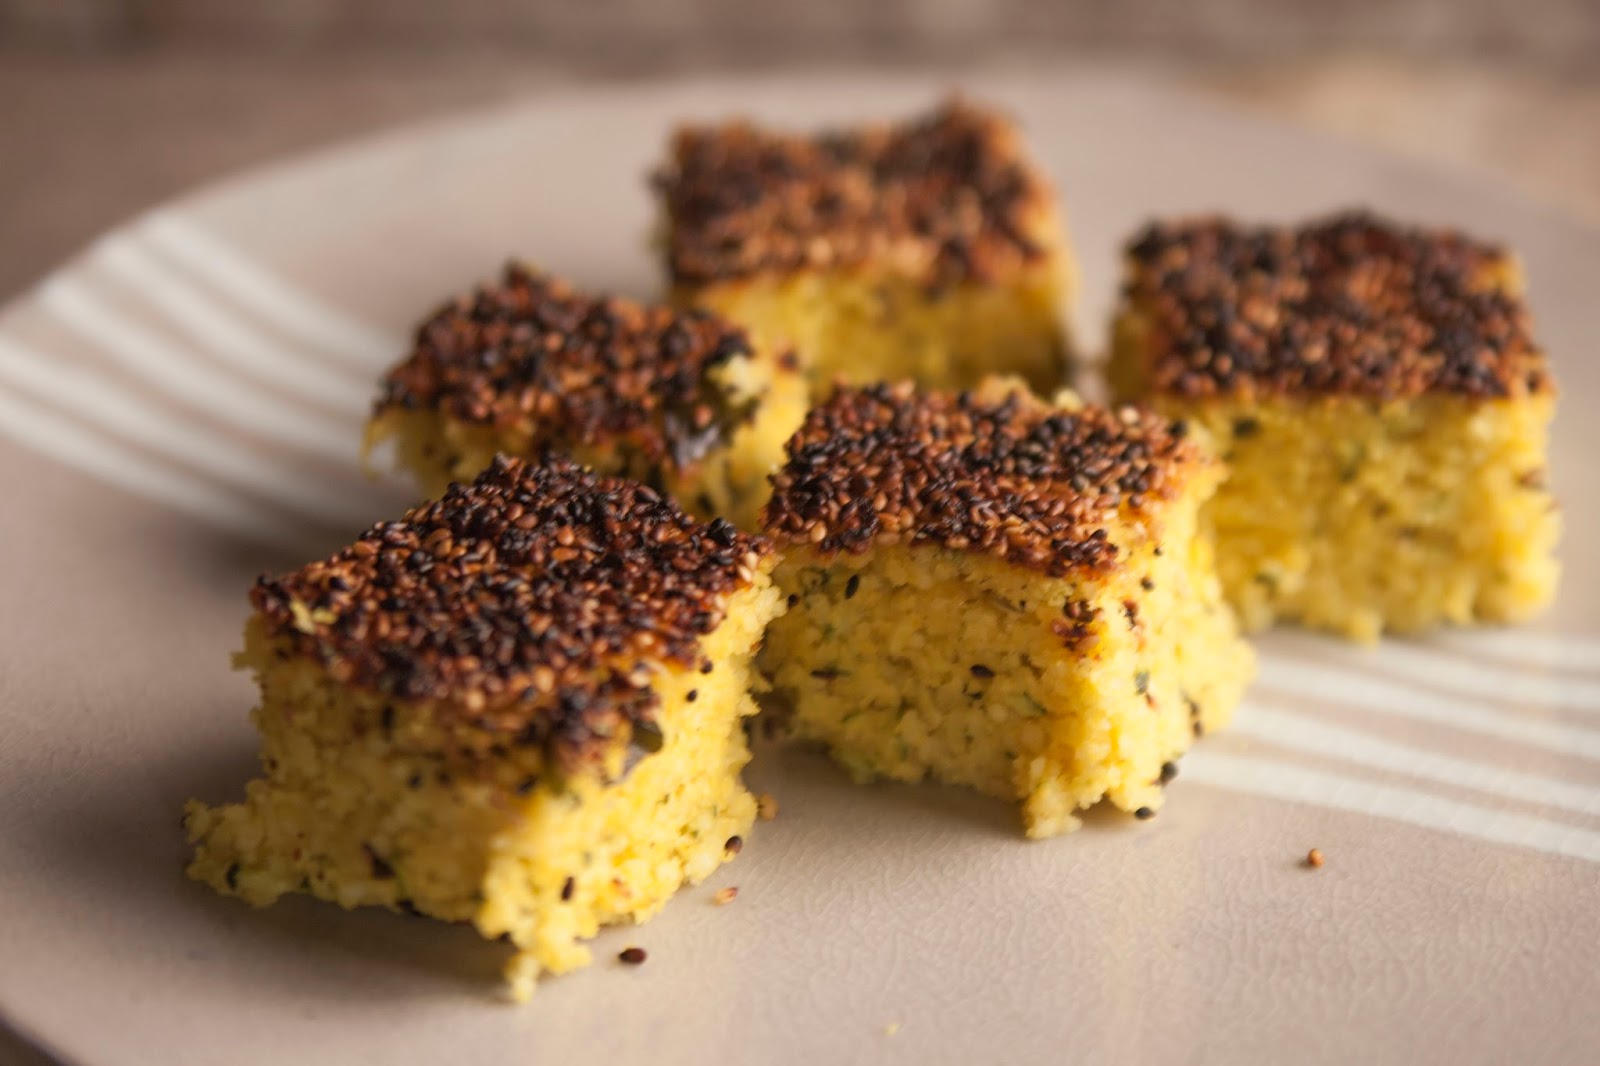
   Handvo is a Gujarati dish, a spicy, savory cake made of ground rice, lentils and vegetables. Sprinkled with sesame and mustard seed,  it has a crisp, crunchy crust and a a warm soft interior. Perfect. Of course like any popular dish anywhere, everyone has their favorite way of making Handvo, all sorts of additions and twists. The recipe I've got here is a pretty basic one and a great start for novice Handvo bakers. 

   Handvo is traditionally made with Bottle Gourd, which is a large pale green squash, like so.


Don't worry if you can't find any Bottle Gourd where you are, zucchini works just great. One final word about Handvo, it has a prep time. There is a time of soaking and a time for grinding and setting. This takes several hours but the actual baking time is less than an hour. So, once you've set things up you really don't have to worry about much until its time to cook.

Gujarati Handvo


Here's What You Need:
1 cup Basmati rice
1/4 cup channa dal
1/4 cup toor or toovar dal
1 Tbs urad dal
1/2 cup of plain yogurt
2 or 3 finely ground serrano chilies
2 tsp ginger paste (fresh ginger ground with a bit of water to make a paste) 
2 tsp shallot or garllic paste (done the same as above)
1 and 1/2 cups of shredded zucchini
2 tsp of salt or to taste
1/2 tsp of ajwain seed or (fennel seed if you don't have ajwain)
2 tsp sugar
1/2 tsp ground turmeric
1/2 tsp citric acid
1/2 tsp baking soda
2 Tbs sesame seeds
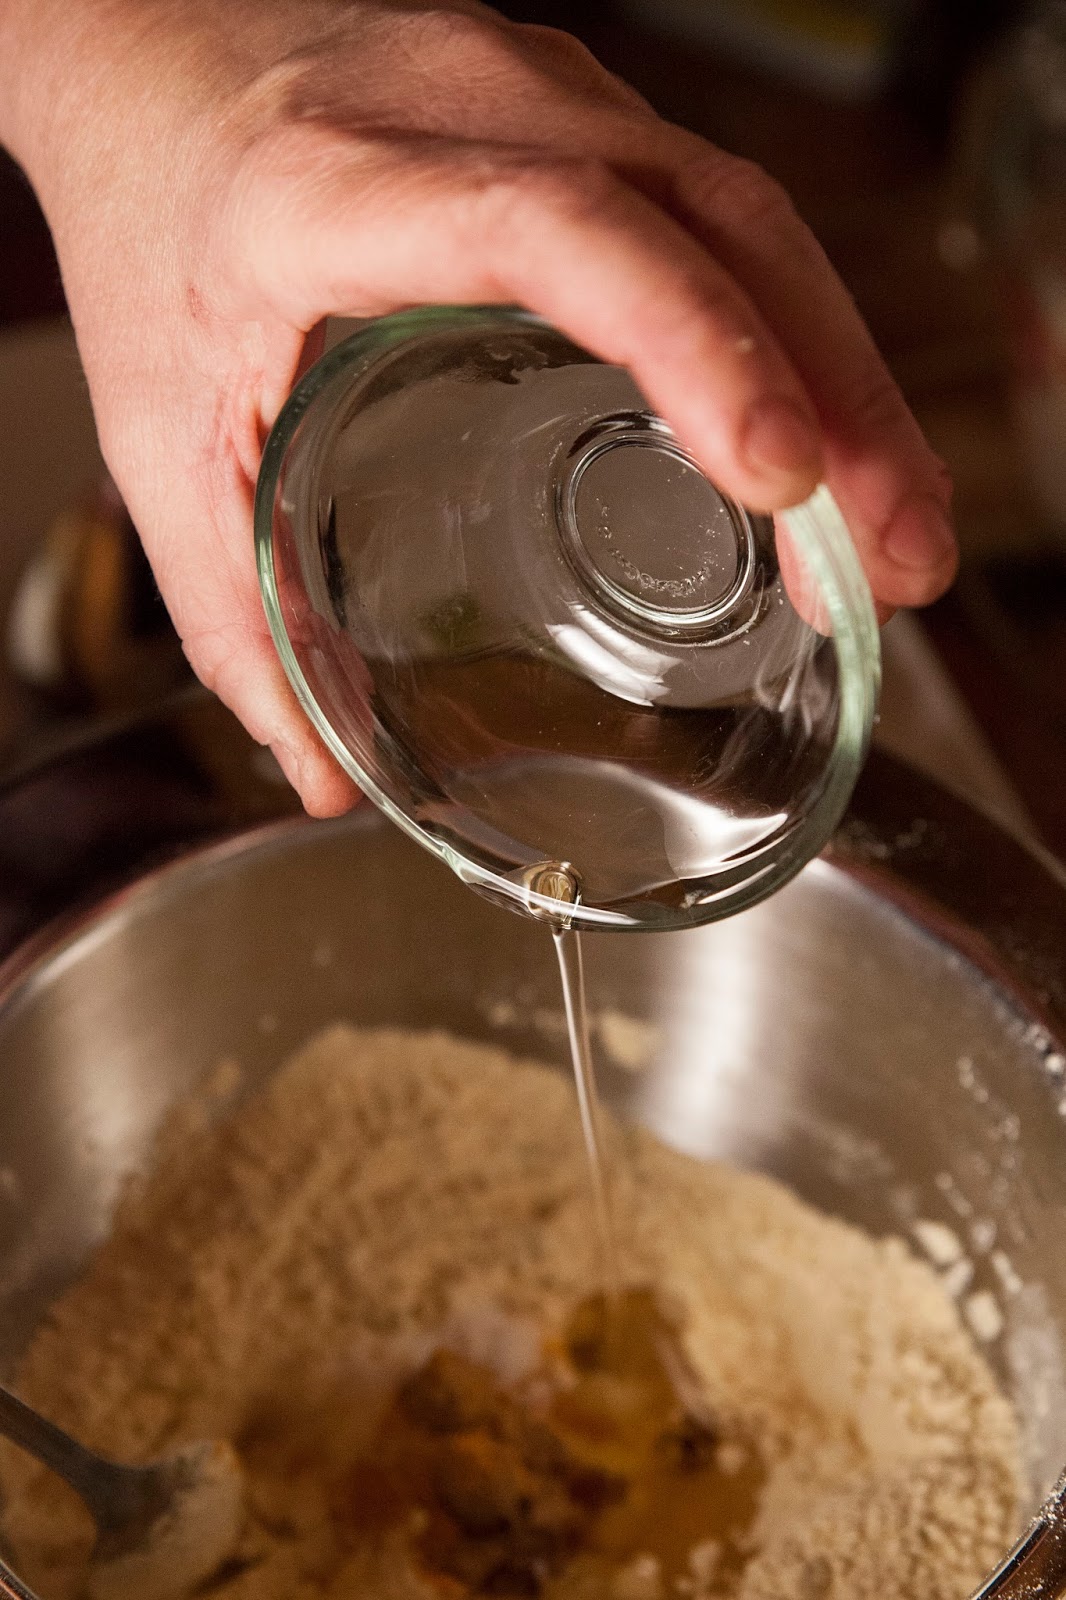
3 Tbs vegetable oil (I always use coconut oil)
1 tsp brown mustard seeds
1/2 tsp Kashmiri chili 
3 curry leaves

Here's What To Do:
Rinse the rice and the dals and soak them in a bowl of water for about 6 hours.
Drain the water from the rice and dal.

In a bowl mix together the turmeric, ginger paste, shallot or garlic paste, serrano chilies, salt, sugar andajwain seed. Set it aside.


Grind together the rice and dals.


 Mix in with 1/2 cup of yogurt...


...and then mix in the spices from the bowl.


Blend everything together well. Set it aside.
Shred the zucchini.


MIx 1 and 1/2 cup of shredded zucchini into the batter.


Stir it all together.
In a small skillet heat 1 Tbs of vegetable oil.
When the oil has heated slightly, add in the curry leaves (if you have them) and the Kashmiri chili.


Mix this chili oil into the batter.


Stir it well once again. Cover the bowl with a cloth and tuck it away in a warm space to rest for at least 6 or 7 hours, or even overnight.


I soaked my rice and dal overnight, let my batter rest from 11 am to 6pm, and then we had it as an evening snack.

When you are ready to bake your Handvo, preheat your oven to 350 degrees.
Grease a round or square cake pan or even a muffin tin if you'd like to make individual Handvo.
When the oven is up to speed, mix the citric acid, and the baking soda into the batter stirring in 1 direction only.
The batter will start to get foamy.


Pour the batter into your pan. Scatter 2 Tbs of sesame seeds over the top.


In a small skillet heat 2 Tbs of vegetable oil.
When the oil is hot, toss in 1 tsp of brown mustard seeds.
When the mustard seeds start to pop and sizzle pour the vegetable oil and mustard seeds over the cake batter.


Like this.


Cover the top of the cake pan with foil and pop it into the over for 40 minutes.
After 40 minutes, remove the foil, turn your oven to broil and pop the cake back in on a broiler rack with the broiler on high.


Let it bake for another 10 minutes or until a crust forms.
Take the pan out and let the cake rest for about 10 to 15 minutes, then cut it up and serve.

handvo
     Crunchy on top with a soft center and a bit of kick from the chilies, this is served as an evening snack, for tea or even brunch or lunch. Basically anytime is the right time for Handvo and thank you to the person who suggested I make some. I hope you'll try it too.

    It's a perfect addition to holiday brunches that include gluten free family and friends. Coming up next, holiday treats and even more from Gujarat. Follow along on Twitter @kathygori

Sunday, November 24, 2013

The 20 Minute Gluten Free Bread, Khaman Dhokla.

dhokla
   This is the kick-off week of cooking season, the time of year when I start to log some serious cooking mileage. Not that I don't cook nearly every day of the week, but this is the time of volume- specialized dining. House guests arrive and with them various dietary requirements. Some  are gluten free, some lactose intolerant, others vegan or vegetarian, and there are always a few Paleo cavemen in the crowd. So, when cooking for a crowd, many of whom have varying allergies, tastes, likes and dislikes, it's always great to be able to kill two birds with one gluten-free stone.
   
   One thing that's happened on more than one occasion is making separate breads for the gluten free, which has lead to a rather unexpected problem. The problem, was keeping the non-celiacs away from this gluten free Gujarati bread. Gujarati cuisine is one the  greatest of the Indian vegetarian kitchens, and whenever I cook for my vegetarian or celiac friends, it's usually where I start.
      A lot of gluten free baked goods use garbanzo bean flour aka besan flour, and it's never put to better use than making Khaman Dhokla. The batter is mixed up quickly, kept in a relatively warm draft-free spot overnight, and then steamed for 20 minutes. It may look complicated, but it's pretty easy.
   
Khaman Dhokla

Here's What You'll Need:

1 and 1/2 cups of sifted garbanzo flour (aka besan)
2 serrano chilies, seeded and finely chopped
1 and 1/2 Tbs finely chopped fresh ginger
1/4 tsp fresh ground black pepper
1/4 tsp turmeric
3/4 tsp salt
1 tsp jaggery or brown sugar
3 Tbs of vegetable oil
2/3 cup of plain yogurt
1/2 tsp baking powder
1/2 tsp baking soda
3 Tbs warm water
1/3 cup fresh or dried grated unsweetened coconut. (If you use dried coconut mix it with a dab of water to moisten it)
3 Tbs of chopped fresh cilantro
1/2 Tbs black mustard seeds
1/4 cup unsalted butter

Here's What To Do:  

Seed and slice  the serrano chilies.


(I do this just in case I'm going to be serving this to people who might be concerned about heat. If you like the spicy, forget it and just toss in  the whole serrano chilies.)


Finely chop them mixed with the fresh ginger.
Add the chilies and ginger to the garbanzo flour.


Add in the turmeric, salt, ground black pepper, and brown sugar.


Mix in the 3 Tbs of vegetable oil.


Blend in the yogurt.


Mix everything together well.


You should have a smooth rather thick batter.
Cover the bowl with a towel.


Make sure it's wrapped. You want to keep the contents warm.


I usually tuck the wrapped bowl in an unheated oven for at least 4 hours or overnight so that it can ferment.
If you're draft free locale is your oven, make sure everybody in the house knows that something is fermenting in there, and make sure no one turns the oven on, otherwise trouble ensues!
When the batter has fermented it's time to do the steaming. This is the 20 minute process.

Take a large deep pot.
Put a trivet in the bottom .
Fill it with about an inch or so of water.
This is the little platform that will hold the cake pan for steaming. You can also use a wok or any sort of steamer that will hold the cake pan.
Lightly grease an 8 inch cake pan.
I make thin little straps of folded tin foil and loop them under the bottom of the pan to make it easier to lower it into the pot.


Like this.
Now you're all set to steam the bread.
Bring the water in the pot to a low boil so that it starts to steam.
Sprinkle 1/2 tsp baking powder and 1/2 tsp baking soda into the fermented batter.


Mix it in while stirring in 1 Direction only.
Add in the 3 Tbs of warm water.


Add in the 3 tbs of warm water, once again stirring in 1 Direction only!
Just remember. What makes your bread beautiful...1 Direction.


The batter will start to bubble and froth.


Pour the batter into the greased pan.


Lower the pan into the steaming pot.


Cover the pot snugly with a towel.


Put a lid on the pot.


Wrap the sides of the towel around the top of the pot.
Steam the bread for about 12 minutes.
You can make sure it's done by taking the lid off and testing the bread with a toothpick. If the toothpick comes out clean, it's done.
Take the bread out of the pot.


Set the pan aside with the towel set over it loosely. Keep it covered for about 10 minutes to rest.
After 10 minutes, turn the bread out on to a plate.


Put the plate onto the top of the cake pan and turn it upside down. It will unmold.


Cut the the bread into criss-cross diamond shapes.


In a small skillet, heat 1/4 cup unsalted butter.
When the butter is hot, toss in 1 and 1/2 Tbs of mustard seeds.


When the mustard seeds start to sizzle and pop...
 Pour it over the top of the cut Dhokla.


Scatter the top with the grated coconut.


Sprinkle on the chopped fresh cilantro.


Cut and stack the pieces.

dhokla
   You can serve this bread hot out of the steamer or at room temperature. Depending on how it's cut, you can have up to 24 pieces. I usually make this bread for Holiday entertaining. It's great on a buffet table, and so good you won't miss the gluten at all. Coming up next, Indian dishes that go well with what ever you happen to be celebrating. Follow along on Twitter @kathygori

Thursday, July 14, 2011

Got Rice? You've Got Bread, And It's Gluten Free.

This is a tale of Coorgis.
No, not this. These are  Corgis.
Cute Corgis
 Not this. These are Courgettes.
"Classy" Courgettes
Which is actually a five dollar word for zucchini. Yeah. You heard me. It's zucchinis' alias when it's trying to get onto a fancy plate. Busted.
   No, I'm talking Coorgis. Coorgi Roti.
Delicious Coorgi Roti
   Now how did all this Coorgi frenzy come about? It turns out that a friend of mine was recently diagnosed as Gluten Intolerant. I've been doing some cooking for her and it's given me a chance to stretch my non-gluten legs.
   If you've ever made chapatti or tortillas you can make Corgi Roti, however if you are gluten intolerant you are giving gluten-rich flour a wide berth, and so you are not getting any of these things.  Of course one can always purchase gluten-free flours and go that way. I was however, looking for something that didn't need any special ingredients.
   A great deal of Indian food being rice based, is naturally gluten free. Besan (chickpea flour) is also used and makes for delicious breads and cakes. So I thought how about using some of that great gluten-free rice as a bread, and what better bread than Coorgi Roti? These roti get their name because they come from the region known as Kodagu, once known as Coorg which is a principle rice growing area.
   This tasty bread is so easy to make it's almost stupid! If you have rice you can make this bread. If you have ever made pancakes you can make this bread, and yes, even if those pancakes came out of a box mix... yes, you can make this bread. 

Coorgi Roti


Here's how:
 Start with 1 and 1/2 cups of soft cooked rice.
 In a bowl sift together:
   2 cups of rice flour
   1 and 1/2 tsp of salt
 Put the cooked rice and 2 Tbs of water into a food processor or blender.
 Blend for about 2 minutes until it turns to a soft puree.
 Dump the puree into a bowl and mix it with the rice flour and salt mixture.
 Knead it until you have a soft, pliable dough.
 Divide the dough into a bunch of little balls.
 Roll out each little ball into a flat round.
 Heat a griddle or tava.
 When it's hot, brush it with melted butter.
 Slap the flat little roti down on the griddle and when it starts to get a bit brown around the edges, turn it like a pancake.
 Cook it a few minutes longer and you are done.
 Brush each with a bit more melted butter (come on this is a treat)  and serve them up.

  These delightful little roti are great with breakfast, lunch or dinner, or even at midnight in the kitchen in your underwear. Not that I'd ever do that. Really. And they're 100 % gluten free!
  This is one of the easiest recipes that I've ever fixed and there is a huge bonus that comes with it. When you make the rice for this recipe you get not only roti, but you get another completely different delicious dish.Looka what ya get.....
"not only do you get the Sham Wow but also the Slap Chop!"
  I'll be posting that recipe next so stay tuned, no shipping or handling charges involved.
   Meanwhile this is the last day of my 2nd Blogiversary Giveaway.
 I'm giving away 2 great gifts: The first is a Copy of the fabulous cookbook Mangos and Curry Leaves 

  The other prize I have is Organic Coconut Water Vinegar from the nice people at Tropical Traditions. This vinegar is great and what can I say, a must have for old skool Indian cooking!
 So how do you get this stuff???? Here's what to do?
1.) Follow  @WorkmanPub  and  @Troptraditions on Twitter 
2.) Follow @kathygori on Twitter or follow my blog The Colors Of Indian Cooking
3.) Tweet about the sponsor and my giveaway  or mention it on your blog
4.) Let me know you've done so

  The drawing is going to be conducted on Random.org. It ends today July 14th. Winners announced tomorrow.  Thanks again to everyone who helps make this blog possible, especially my husband Alan Berger for his great photographs.  
     Follow along on Twitter @kathygori  

LinkWithin

Blog Widget by LinkWithin