Showing posts with label Indian desserts. Show all posts

Friday, October 28, 2016

Burfi, A Simple Indian Fudge With A Touch of Rose and Pistachio for Diwali

   
   The celebrating season is arriving all over the world it seems. No matter where one lives, this time of year brings with it, family, friends and partying. Of course no party would be complete without the sweets and when it comes to sweets and celebrating, Diwali is right up there at the top. Diwali if you're not familiar with it, is the Hindu Festival of Lights and this year it starts Sunday, October 30th. Diwali represents the victory of light over darkness, good over evil, knowledge over ignorance, and hope over despair, While the festival lasts about 5 days, Diwali Night is the night of the darkest new moon, night of the Hindu lunarsolar, month of Kartika. It's not just a Hindu holiday it's also celebrated by Jains, Sikhs, and the Newar Buddhists. So, you get the picture, this is a big deal holiday in many parts of the world which is why some of the best desserts are created and served at this time of year.

   One dessert in particular is popular and that is burfi. Burfi is a  type of Indian milk fudge. It's quick and easy to make and damn tasty. So in the holiday spirit I decided to whip up a batch. I'd seen some gorgeous burfi made with rosewater and slivered almonds so I decided to make some too, only I'd go for a dusty rose color and use pistachios rather than almonds since I thought the dark pink of the burfi would look great with the green of the pistachios. This is a very simple recipe and only takes a little while to make, so for impatient sweet eaters...this is for you.

Rose Maida Burfi With Pistachio


Here's What You Need: 
1/4 cup pastry or cake flour
2 Tbs unsalted butter or ghee plus 1 tsp for greasing the plate
3 Tbs chopped unsalted pistachios
1/2 tsp rose water
1/2 cup of sugar
1/4 cup of water

Here's What To Do: 
Grease a large plate with 1 tsp of melted butter or ghee and set it aside.
In a skillet or kadhai heat  2 Tbs of unsalted butter or ghee. When the butter is hot and starting to smoke add 1/4 cup of cake flour and stir it together well.


You want it to have a dry sandy texture. This only takes a minute or two to accomplish. Set the mixture aside.
pour 1/4 cup of water into a small pot.


Add in 1/2 cup of sugar.


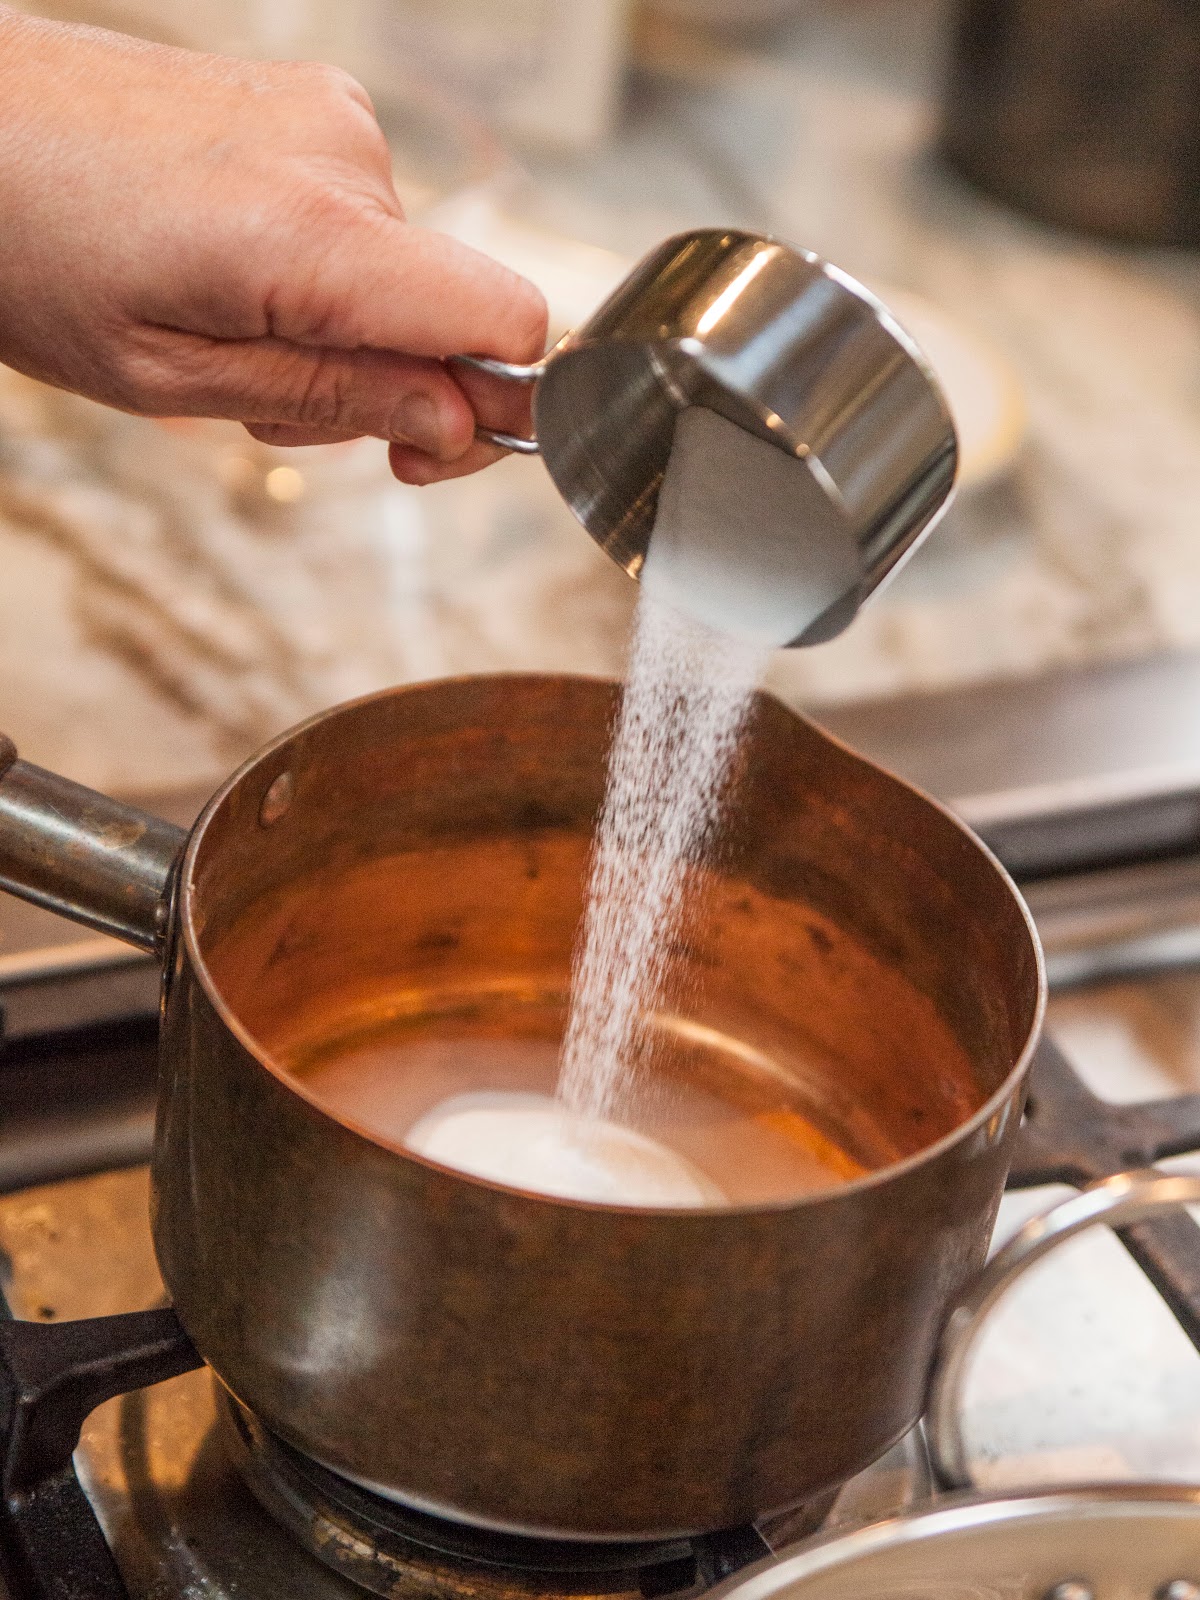
Stir the mixture together well and bring it to a boil.

Keep stirring. You want the sugar water mixture to get to the single thread stage. This means that the sugar/water mixture forms a thin thread if you put a drop on your finger...


Okay. There's a note with this...BE FREAKING CAREFUL!!!!!  This stuff is hot hot hot!!! I have been flipping chapattis for so many years barehanded, I don't even think I have fingerprints left... but I was still careful. Of course if you have a candy thermometer that can tell you when the sugar reaches that stage....(what a concept) use that. You won't be sorry.
Once the sugar/water is ready, mix the food coloring into it. I used 4 drops of red, and  2 of blue to give a deep dusty rose color.


Then mix the flour and butter mixture into the colored sugar water...


...and stir stir stir. Add in 1/2 tsp of rose water at this time.
It is going to look at first like a very liquid mixture, but as you keep stirring it will thicken up and start to leave the sides of the pan. When it does, pour it onto the buttered plate...


...and start shaping it into a square.


Take a piece of clingfilm or cut up a Ziplock bag and smooth the surface of the burfi.
Press the chopped up pistachios into the surface.


Even it all out...


...and set it aside to set for about 15 minutes.
Cut it into bite size squares and serve it up! Burfi!


   This snack goes beautifully with a cup of hot chai or coffee. Fast and simple this is a great holiday treat to have at home for visiting guests. Coming up next, I'm doing more easy Holiday/Diwali treats and giving a new Deiss Pro Grater a test run! Follow along on Twitter @kathygori

Friday, October 7, 2016

The End of My Research. Gulab Jamun: Gluten Free and Baked Not Fried.

baked gulab jamun, gluten free gulab jamun
        
   It's been quite a while since I've made Gulab Jamun, not because I don't absolutely love this Bengali sweet, but because I'm not exactly crazy about all the frying involved with making them. Lately, I've also been involved with designing  gluten free desserts for the new CocoaPlanet  Tasting Room and Bistro opening here in Sonoma, so I haven't bothered doing many things that involve gluten. I've also been thinking, so many Indian dishes, can be made by substituting baking for frying...why not Gulab Jamun? So I decided to do some research and see if anyone has managed to do the baking thing with them.

   A quick look showed me that, yeah Gulab Jamun have been prepared in the oven instead of a kadhai filled with boiling oil. I perused a few recipes from various people and decided to start experimenting. After a few non-successful attempts where the Gulab Jamun just didn't color up properly....I finally found one that worked. It was my same formula, just different baking times and temps. Anudivya of the site And a Little Bit More had solved the baking not frying part about 5 years ago. I added to that my Gluten Free Gulab Jamun recipe and bingo! Success. Also, this recipe works exactly the same if you are not gluten free...just use regular flour.

Baked Gulab Jamun, Gluten Free or Not

Here's What You Need:
1/4 cup  gluten free flour or all purpose flour  ( I use my own special blend)
1/2 cup of powdered whole milk
a pinch of baking powder
1/4 cup of whipping cream
3/4 cup of sugar
1 cup of water
! tsp rose water
2 Tbs chopped pistachios
parchment paper

Here's What To Do:
Preheat the oven to 375 degrees
Mix together the flour and the powdered milk.


Add in the pinch of baking powder.


Add in 1/4 cup of cream.
Stir with a spoon until you have a nice soft dough. If you need to add a bit more whipping cream to get it where you want it...do so.


Break the dough off into pieces. Roll the dough between your palms to form balls. This recipe will make about 7 of them.


Place the balls on a cookie sheet covered with parchment paper.


Place them into the preheated oven on a rack placed near the top and bake them for about 8  minutes.


Bake them until the tops of the balls start to turn golden...


...and the bottoms turn a light brown. If it takes a bit longer than 8 minutes don't worry about it. This is a recipe you have to eyeball.


You should be able to pick them up and handle them without them losing their shape. They should also have puffed up from their baking.
Take them out of the oven, and remove the parchment paper.
Put the balls back on the cookie sheet. Turn your oven to broil.
Here's the important part...Watch These Suckers Like A Hawk!!!!! They can easily burn!!!
The idea is to broil them until they turn a nice dark brown.
When they are done, remove them from the oven and set them aside.
Fill a pan or kadhai with 1 cup of water and 3/4 cup sugar.


Mix it together until the sugar is dissolved in the water and then bring the mixture to a boil.
Turn it down to a simmer, and add in 1 tsp of rose water
Add in your baked Gulab Jamuns and let them simmer for 2 minutes, then turn off the heat and let them soak in the syrup for at least 1/2 hour.


Place a couple of them in a small bowl , spoon the warm syrup over them and scatter some chopped pistachios on top and serve them up!!!

gulab jamun
 
   Gulab Jamuns, baked not fried. I made several batches of these yesterday, testing them and it works  the same whether you are using regular flour or gluten free. It's a fast and easy to make dessert and no gluten-free people ever need to skip Gulab Jamun again! Coming up next , I take on some quick snacks for Fall movie watching/couch surfing and Kheema Pav with a difference follow along on Twitter @kathygori

Tuesday, November 29, 2011

The Great Make Ahead Dessert, Simple Poached Apricots in Cardamom Syrup

 
   I have to admit, dessert is not the first thing I think about when I'm planning a meal. Of course there are those destination desserts... show stoppers when everything on the table is the big run up to the final blow-out. There are those times when I do plan the dessert first.. but they're rare. I think one reason I do this is because desserts weren't a big deal in our house when I was growing up. Dessert might most typically be a scoop of sherbert and a Stella D'Oro cookie.

   If you grew up in an Italian household you'll know Stella D'Oro. I'll never forget sitting in my Nonna's kitchen listening to Italian ping ponging around me (which I couldn't understand) while the adults argued about the latest news in L'Italo, sipped small cups of strong coffee (I was given a large bowl of warm milk and coffee) and crunched Stella D'Oro Roman Egg Cookies. Sometimes the cookies would be accompanied by stewed fruit of some sort. What Grandma doesn't push stewed fruit? It was a perfect late afternoon treat, and it's the memories of that that led me to this classic Indian dessert.

   Because after one is greasy with goat meat, and the only thing that will go down easy besides a "Lovers' Walk" is something light and aromatic, a delicate note was what was called for to finish the meal. So I decided to make Apricots in Cardamom Syrup served with some Almond Cardamom Cookies and a bit of sirkhand.*

*Sirkhand. Take a cup of yogurt and place it in a yogurt strainer suspended over a glass. Let it drain for at least 4 hours, or until it's slightly thickened. Mix in a bit of powdered sugar to sweeten it slightly.
 
   One great thing about this dessert is that it can be made a day or two ahead and refrigerated so that it's out of your hair the day you want to serve it. As long as you remember to bring it to room temperature before serving to avoid that charming "Grandma's-canned-apricots-right-out-of-the-tin-can-in-the-fridge" flavor.


Poached Apricots With Cardamom


Here's What You Need:

 1 and 2/3 cups of dried apricots (get the best ones you can)
 3 Tbs of superfine sugar
 One  1/2 inch piece of peeled fresh ginger
 4 whole green cardamom pods
 1 cinnamon stick
   
Here's What To Do:

Soak the apricots in 3 cups of water in a large saucepan or handi for 4 hrs or until they puff up
Add in :
 3 Tbs of sugar
 One 1/2 inch piece of peeled fresh ginger thinly sliced
 4 cardamom pods
 1 cinnamon stick

Mix everything together well until the sugar has dissolved and bring it all to a slow boil.


When it boils, turn the heat down to a simmer and cook gently until the liquid has gone down by half and the remaining liquid has become a thick syrup.
Pour everything into a bowl and refrigerate.


  Serve it up in small bowls.


I  passed around the cookies.


   Traditionally for very fancy affairs such as weddings, this dessert is topped with thin pieces of edible silver or vark. I used a dollop of simple, lightly sweetened sirkhand and served it all with warm Chai.

 
   So, the idea of simple, stewed apricots is elevated by the addition of aromatic spices to a real dinner party treat. Fancy schmancy! I'm going to look for some edible silver from a bakery supply place, or not. On second thought I'm afraid it might take me into that freaky deaky Sweet Genius dude territory.


   And I'll be saying stuff like, "A Truss! Ennui!  Are you a Sweet Genius? Amuse me!" and then "Here, now incorporate this Ben Gay! You have 5 minutes!"
 
   On second thought maybe I'll deep six the silver. I'm no Sweet Genius, that's for sure.

   Coming up next, Spinach and a Fistful of Shitakes is not a spaghetti western but a great vegetarian dish. Follow along on Twitter @kathygori

Thursday, October 27, 2011

Put On Your Party Pants... It's Laddu Time!


   The holiday sweet-making season has been officially kicked off around our house with the Indian celebration of Diwali. Diwali, the Festival of Light, the celebration of the triumph of goodness over evil, is not something that I grew up celebrating in my Italian American household. No, we had stuff like Little Christmas which brought out some very "interesting" cheeses to say the least, and cakes with tiny, hard metal fortune telling treats baked into them. Bite in. Hit a Coin?! You'll have riches... so will your dentist.

   Despite this I have never met a holiday I didn't like. Celebrating something? Really? I'm down for it! Does this holiday feature some delicious tasty sweet treats? I'm double down. Are these treats easy to make with ingredients I don't have to drive 25 miles each way to whip up? Even better. I am so there. So here I am, smack in the middle of Diwali with some great easy and fast recipes. One of my favorites is Laddu.
  
   Laddu  are some of the most popular treats served at Diwali. These round, sweet balls of deliciousness are made of some sort of grain (yes, some are gluten free) mixed with melted butter or ghee and sugar, and finally stuffed with spices, nuts and raisins. Laddu can be made ahead and ready for party action within a couple of hours. And after all, when there's sweet stuff involved,  who doesn't want the trip from pan to mouth to be quick, quick, quick?  So, wasting no time..

Laddu


Here's what to do:
In a large bowl mix together:
  2 cups of fine semolina flour (found at any grocery store)
  1 cup of fresh grated coconut (you can always use frozen as I did, which can be gotten at most Hispanic or Asian markets.)
Mix it all together well, then cover the bowl and set it aside for at least a 1/2 hour or so.
In a large skillet or kadhai, melt 1/2 cup of ghee or 1/2 cup which is the same as 1 stick of unsalted butter. Melt it on medium heat.


When the butter is melting and foamy, add in the semolina and coconut mixture. Turn the heat down and saute the semolina and coconut.


Don't let the mixture brown, (keep stirring.) You want it nice and plump and golden, like this. This should take about 15 to 20 minutes.


Put the mixture onto a plate and let it cool.
Meanwhile, here's the only scary part (for me) about making this dessert, and that is...

The Sugar Syrup.
Mix together:
  1 and 1/2 cup of sugar
  1 cup of water
in the skillet or kadhai.
Stir it around until the sugar melts  at a medium heat.
Then cook it down on a lower heat until the sugar water mixture gets to what is called single thread consistency. This is usually the part I hate as I get very nervous around melting sugar.
Here's a little explanation of Single Thread Consistency. What I did was watch the sugar syrup like a hawk until my candy thermometer came to about 222 degrees.


When the sugar syrup reaches that perfect temperature, take the pan off the flame.
Add in:
 20 golden raisins
 20 cashews


The ground up seeds from 8 cardamom pods
Mix everything together well.


Put a lid on things and let it sit for 30 minutes.
 Now for the fun.

Making The Laddus
Take the mixture and shape it into small balls by rolling it in the palms of your hands.
Little tip:  One thing that helps in doing this is moistening your hands.


This should make anywhere from 24 to 30 laddus. Store the laddus in an airtight container in the fridge. If you can't get your laddus into the right shape right away, just pop them in the fridge for a bit and then roll them again to a smooth and shiny finish.


   Serve them up with a cup of chai, or whatever makes your parties perfect! These were amazingly delicious and popular with everyone and will be making a repeat appearance on my table throughout the holiday season.

   Coming up next, these laddu are not the only sort out there. Another laddu is coming up that's completely gluten free! Follow along on Twitter @kathygori

Wednesday, July 28, 2010

The Banana Split.... Deconstructed. A Light Variation On A Classic.

    
   This is a post about Banana Splits and a confession. I have to be thoroughly honest here and say that I'm not an expert on banana splits. In fact I've never eaten a banana split. It's not that they haven't looked good, and I'm sure they taste great, it's just that they've always appeared so daunting to me. The giant curve of banana, the tons of whipped cream, ice cream, different syrups, nuts and cherries. The reason I never started eating a banana split is mainly because I knew I'd never make it out alive.

   The other thing about Banana Splits is that they've always seemed to be a "date dessert," a real retro Archie and Veronica thing. The sort of dessert that would be on the table between Gidget and Moondoggy in some old movie. Not that Jonah Hill wouldn't be caught dead eating one, it just wouldn't be on-screen, and maybe it wouldn't even be eating.

    Then I read about Kelly Ripas' Build A Banana Split For Ovarian Cancer Research Contest, and I saw all the wonderful Banana Splits that my fellow Foodbloggers created, and I was hooked. The world of Banana Splits was opened to me and of course I wanted to contribute to this great cause. The question was, how?

    I've never seen an Indian version of the Banana Split. Of course there are Indian desserts that feature bananas, there are dishes that feature plantains and there are many, many, many Indian sweets. I knew that if I wanted to make a Banana Split it would have to have Indian flavors and be suitable for serving after an elaborate Indian dinner.  I figured that in order to make my split I ought to break down the components, toss the ones that didn't work, keep the ones that did, and hopefully come out with a Banana Split with an Indian twist.

   Number 1 was Bananas..no way around that. They were a keeper. For a moment I considered Plantains but decided to go the purist route.


  Number 2 was ice cream. Banana Splits use scoops of ice cream, sometimes the same flavor, sometimes a mix of flavors. I decided in the name of simplicity to stick with one flavor, so I created a Rose Lassi Ice Cream.

  Number 3 was whipped cream and here Alan and I had a disagreement. He wanted whipped cream. I thought the whipped cream would be too sweet and somehow "wrong" so I started draining yogurt for sirkhand, a type of sweetened thickened Indian version of creme fraiche.

   Number 4 was nuts.. (which was what I started to think I was cooking this up). Indian desserts often feature pistachios, so they were a lock.

    I also decided that I wanted to make the dish elegant, or as elegant as I could. I decided on a deconstructed Banana Split served almost as a dessert amuse bouche.


Banana Split Indian Style


Here's what I did:
 
Start with The Banana Part
Get 3 bananas. Cut them in rounds.


 In a deep skillet or kadhai, heat about 4 Tbs of unsalted butter.
When the butter melts add in about 4 Tbs of Indian jaggery or if you haven't got that, dark brown sugar.


When the sugar has dissolved in the butter, toss in the banana pieces and coat them well.


When the bananas are cooked and glossy (this only takes a few minutes) add in 1/2 cup of grated unsweetened coconut.
I've been lucky enough to score a sample of Tropical Traditions Organic Shredded Coconut and so I used that.


  Wheeeee! Here it goes.


Blend it in well, then take the bananas off the heat and set them aside to cool.

 
Now on to The Ice Cream Part.
I decided a Sweet Lassi Rose Ice Cream would be great with the bananas. This is what I did.
In a large bowl mix:
 3/4 cup of sugar
 2 cups of buttermilk
Whisk it together well until the sugar is blended in then add in:
 2 cups of whipping cream
 1 tsp of rose water
 a pinch of kosher salt.
Pour everything into an ice cream maker and process as usual. Put it into the freezer until you're ready.

Now for the Sirkhand.
Take a cup of yogurt and place it in a yogurt strainer suspended over a glass. Let it drain for at least 4 hours, or until it's slightly thickened. Mix in a bit of powdered sugar to sweeten it slightly.

Putting It All Together.
This took some thought. I tried it a few different ways, (of course I had to sample the various versions) and finally at Alan's suggestion I found the way that worked.
 This is it.
 I had several grappa glasses, small, slender glasses just a fit for an iced tea spoon.
 I stacked my fillings into the glasses.
  1.) On the bottom a bit of sirkhand for a slightly tartish( is that a word?) finish.
  2.) next a sprinkling of finely chopped pistachio nuts
  3.) 3 rounds of the cooked coconut coated bananas
  4.) 2  rounds of Sweet Rose Lassi Ice Cream
  5.)  A small sprinkle of chopped pistachio nuts


   There it is. When a spoon is dipped in one gets all the flavors of a banana split, without the traditional shape. With the butter and coconut and jaggery flavor, a small dessert goes a long way. It's rich but not heavy, and Alan reports that no weight was gained in the consumption of this Banana Split, but full pleasure was experienced. A win/win.

   So there it is, my version of a Banana Split. If you'd like to make a virtual Banana Split yourself, visit Kelly Ripas' website and create one. For each Banana Split that's made, $1.00 is donated to Ovarian Cancer research, and there are other goodies for you virtual splitters too, so surf on over and check it out.

LinkWithin

Blog Widget by LinkWithin