Showing posts with label bread. Show all posts

Friday, January 27, 2012

Peasant Bread, Royally Easy! #Baketogether


   Like everyone else, I spent the month of December glutting and rutting around the world of all things sweet and rich. Buttery, sugary, creamy and chocolaty, we went whole hog down the dessert rabbit hole. Hog is the operative word here. Any more cookies and treats and I'd have to start looking for truffles on a leash. After a month of sweets I bounced into January craving savories, turnips, and bao, and mushroom soup. Yes there were some donuts in there, but hey, they were baked!! But still they were donuts and I needed to get back to the good and the simple and the pure. Normally, that means getting back to the usual Indian vegetarian and vegan dishes that I regularly cook, but then I ran across something that changed my mind completely and that was Abby Dodge's Bake Togther Project.

   The Bake Together Project for the month of January was a Peasant Boule. A lovely homey and above all easy to make loaf of bread. This is not any old loaf of bread. This is special. This is the sort of loaf that calls out to one to "put some soup on, Honey. I'm home!" So what makes this bread so special?
  • The Peasant Boule that Abby featured, is a bread that's made with "instant yeast" this is quick acting stuff that I'd never worked with before. This is yeast on steroids and it bulks up to a nice round puffy dough in no time, that is if you think 45 minutes is no time (I do!)
  • The Peasant Boule is baked in an 8 inch cake pan (no special equipment here)  almost everyone has one of those.
  • The Peasant Boule  is so versatile, anything  (flavors, herbs, fruit, nuts) can be added to it, that there is virtually nothing one can do to it to mess it up. 
 After reading all the great stuff about this bread I had to try it.

   As it turned out, I had the perfect opportunity. I'd recently come into possession of an electric pasta  machine, I had cured some guanciale (Roman bacon) that I was dying to try in an A'matriciana sauce and I was planning on busting out my new Ricotta making skills. The handwriting was on the wall. I was roots bound, I was going back to my ancestral origins, I was going to cook an Italian dinner. The Peasant Boule was going on the menu. In making Abby's bread, I followed the Bake Together Rules, and I made my own adjustment to the recipe. I decided to make an Olive Oil Rosemary loaf. You might want to try this bread and #Baketogether too.

Peasant Boule


Here's What You Need:

3 1/3 cups  all purpose flour
1 packet  instant yeast (Rapid Rise)
2 tablespoons sugar
1 1/2 teaspoons table salt
1 1/2 teaspoons baking powder
1 1/3 cups warm water (between 115 and 125 degrees)
3 Tbs of Olive Oil
1 Tbs of chopped fresh rosemary

The preparation of this bread calls for a stand mixer. I don't have one, but I do have a food processor with a dough blade and it worked just fine.

Here's What To Do:

In the bowl of a food processor mix together the flour, sugar, salt, baking powder,rosemary and yeast.
Turn the food processor on and pour in the warm water. The water needs to be at least 115 degrees and no more then 125 for this yeast to work. I used a cooking thermometer and it worked just fine.
The dough will start to come together in the bowl and will quickly turn bread ready. Run the food processor for about 5 minutes or maybe a bit less. I started to get a little worried since it was really flying around and my processor was bouncing on the counter. I was afraid I'd burn the motor out, but no way. It worked!
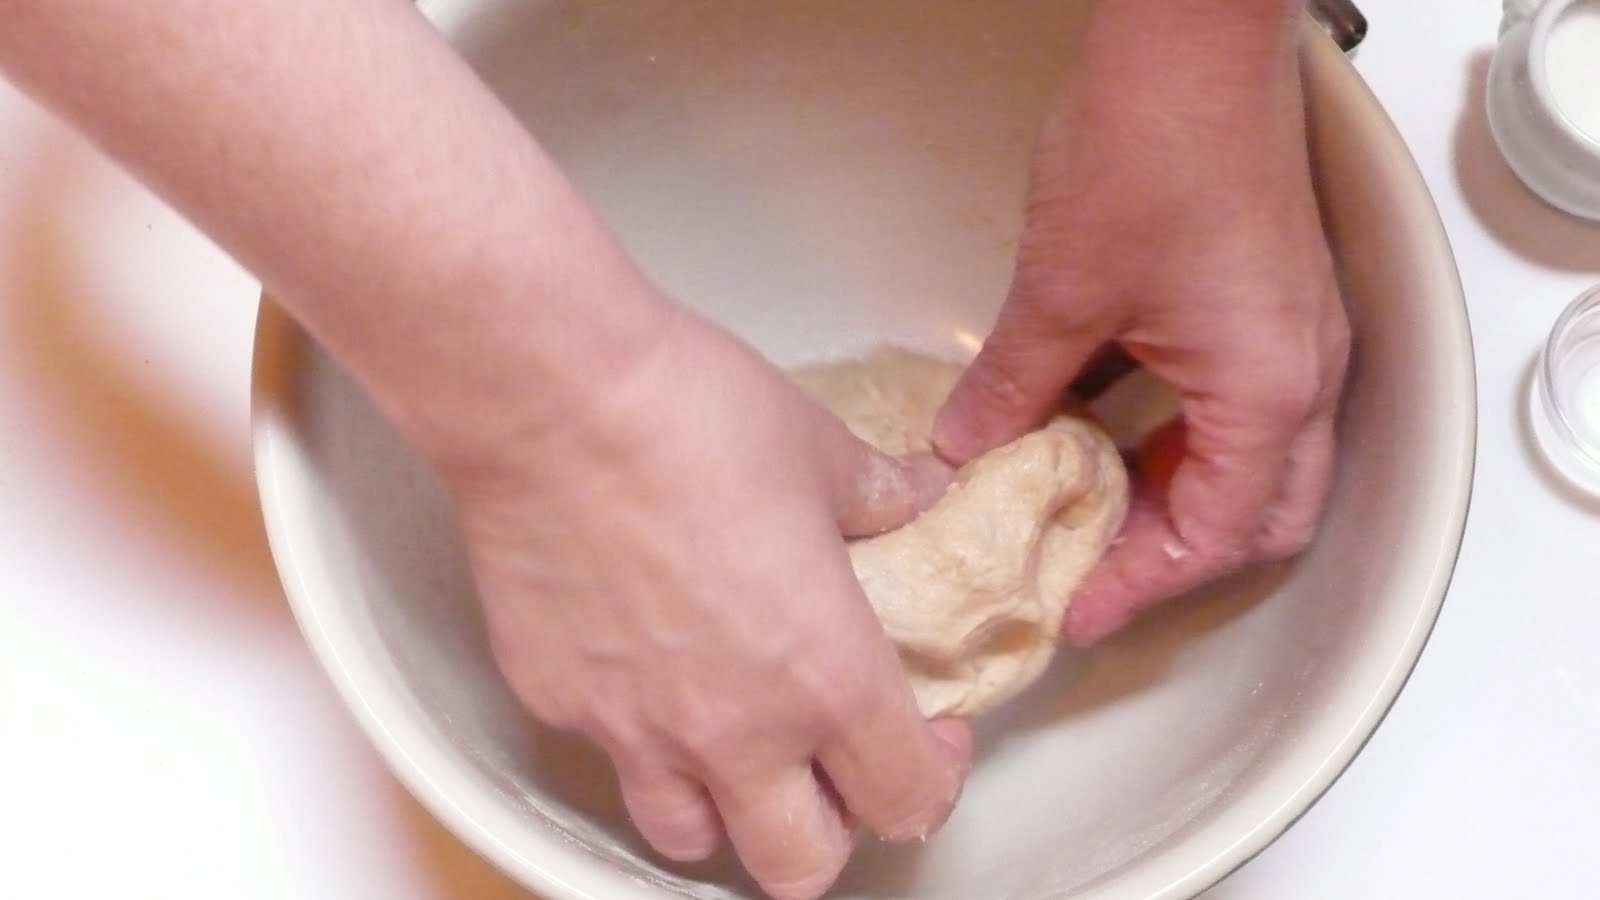
Scoop the dough out and roll it into a ball, put the dough into a lightly greased bowl (I greased it with olive oil) smooth side up. Cover the top of the bowl tightly with saran wrap and let it rise in a warm place for about 45 minutes, or until it doubles in size.
When it's doubled, dump it out on to a clean surface, (you don't have to flour it.)


Press it down to deflate it.


Shape it into a 7 inch round and place the whole thing in a lightly oiled 8 inch cake pan. Yes, that's right, nothing special, just a plain old cake pan. I rubbed the top of the dough with a bit of olive oil, and let it rise.

I didn't have an 8 inch cake pan. I had a 9 inch so my dough didn't get quite as tall as it might have.


Let the dough rest in the cake pan until it's doubled again, about 25 minutes or more. It all depends on the  temperature in the room the dough is sitting in. About 15 minutes before you're ready to bake the bread, preheat the over to 375 degrees.


Put the bread on the middle rack in the oven and let it bake for about 40 minutes. When the bread turns brown on top and the top sounds hollow when tapped, it's done!
Place the pan of bread on a cooling rack. Take the bread out of the pan and set it on the rack to cool. I set mine down next to my newly made fresh pasta.

 Serve and stand back because this stuff goes fast!


   The peasant boule toasts like a dream and it's the perfect sandwich bread. It was the perfect accompaniment for an Italian meal, but after looking at all the various ways of interpreting this bread I can't wait to try some of the other ways that have been suggested. That is, if I'm allowed. I've already received orders from headquarters for more of this great rosemary bread. It seems it's pretty popular for chicken sandwiches with roasted red peppers around our house. I on the other hand, am itching to try it with figs, or olives or orange zest for a great brunch treat. Okay, I have to make a confession here. Visions of French Toast have already danced through my head, but I'm not saying anything about it right now.

   Coming up next, I am no longer a pasta machine virgin as I present electric vermicelli bugaloo. Follow along on Twitter @kathygori

Saturday, September 17, 2011

In Search Of The Perfect Loaf...For Loafers


   Everybody has one of two movies that have made an impression on them in their lives... or maybe five or six. Either way, I believe we all walk around with internal movies playing in our heads, or at least the trailers for them. There's that deep voiced guy  saying... "In a world where everything was upside down...." you take it from there.
   I know that I cannot for the life of me try on clothes without thinking of Julia Roberts in that dressing room in Pretty Woman (hey, I told you this was a fantasy) or set a table without the memory of Babettes' Feast, and don't even get me started on the endless outfits in The Devil Wears Prada. But the movie that made one of the biggest impressions on me didn't concern stilettos or over the top food porn. It had to do with Anthony Hopkins and Alec Baldwin with a pissed off Kodiak bear on their ass in The Edge .


   In this movie Anthony Hopkins (Sir) is stranded out in the woods with Alec Baldwin, and what keeps them alive is that Hopkins' character Charles knows how to do stuff. The old fashioned way.  Ancient lore. Which was why after seeing this film, I really decided there were a few things I needed to know how to do well. Just in case of a zombie attack or 2012, I wanted to be prepared. It's not that I was a Girl Scout. Actually I was a pretty poor Girl Scout all things considered. The only badge I ever managed to get was The Story Teller Badge... and that could easily be confused with just being a good liar.
   My Girl Scout troop was unusual to say the least. We met in the Tiki bar in the basement rec room of our troop leader's house. Nine little Girl Scouts on barstools  glueing rhinestones onto empty pill bottles, making "perfume bottles" for our moms while our Troop leader and her assistant, the bored lady from next door, sipped cocktails and listened to Louis Prima.
  After picking me up from Girl Scouts a few times and getting the blinged-out pill bottle for Mothers' Day, my mom pulled me from the troop and the troop was disbanded. We never went camping, but come to think of it, that Tiki bar was pretty damn campy all by its' ownself. Who was that troop leader you may ask? Judy Garland? No, just some lady who taught us to Be Prepared cause even old Valium bottles can be re-purposed.
   But how does that get us back to basics? Well, I actually read my girl scout handbook and then got other books on " things one should know."  My great grandmother's Native Daughters of the Golden West Cookbook for one, filled with recipes that had no cooking times and talked a lot about "hot" fires in the stove and measuring things out in "dessert spoons." It also contained recipes for Squirrel, and venison, how to clean a wild duck and how to make candy. How to preserve crabapples and pickle watermelon and something called Bible Cake and Batchelor Bait Cake.
   Damn I thought, enough with the Valley of the Dolls Craft Hour..these dames were pre-pared... big time! I wanted to learn to do these things too. Because after the zombies attack somebody has to re-start civilization, and where better to start than with the staff of life... bread.
   Years ago my mom got a booklet in the mail advertising a bread machine. Back in the day, these machines were rare and pricy and totally off the table for my household. I however was fascinated by the booklet. It was filed with bread recipes. I studied them and then I started to bake. I'd get right up to the part that said put into the bread machine... and then what? I grabbed great Grandma Fanny's cookbook. It told me to knead and let rise and punch down and let rise again and then bake in a "hot fire" (about 450 degrees). I had made bread! Without an expensive machine. I quickly went through all the recipes in the freebee booklet.
   Over the years I made bread occasionally, but it was a long tedious process.So I stopped, but I was always intrigued by those fancy crusty (pricey) artisan loaves. And then came the New York Times Mark Bittman and No Knead Bread. I had to try it. I did and it worked... amazingly. Though my  bread was never as attractive as the loaves illustrated, it still tasted good. I knew however that it could be better so I went on a search to perfect The Easiest Bread In The World.
   One key turned out to be the flour I was using plain old organic, unbleached flour, I needed a true, high gluten, high protein flour to give my bread a kick in the pants and get it up on its' feet. Paula Wolfert had given me a big bag of Giustos Organic Ultimate Performer Unbleached Flour to try.


I tried it. It was amazing... but I still had the problem of spread (don't we all) and how to fix it. Paula lent me a Sassafras-La-Cloche-Brick-Oven Baker. Think of it as Spanx for your dough.
   It was a good thing she lent it to me because I was unable to buy one. They're sold out everywhere and I was on a waiting list. The deal with this baker is that it duplicates a brick oven in your stove. I was using two pizza stones, one on top and one on the bottom, but the enclosed oven provides perfect humidity allowing the steam in the bread to escape, leaving all those  gorgeous holes in the crumb. Also it helps the dough keep it's shape and not spread out in the hot oven. It also does not require a pan of hot water beneath the baking bread to provide moisture.
 So, I had the perfect flour and a great container to bake the bread in. The rest was easy.


Artisan Bread


Here's what to do:
In a large bowl mix together:
 3 cups of bread flour

 1/4 tsp of yeast
 2 and 1/4 tsp of Kosher salt
MIx all the dry ingredients together well and then add in:
 1 and 1/2 cup of lukewarm water
Stir everything together with a wooden spoon.
 You should have a thick, goopy mass of dough.

   Cover it tightly with plastic wrap and set it in a warm place to rest for at least 12 hours.
 If the dough is going to be sitting for more than 24 hours, store it in the fridge. It will keep there just fine for about 2 weeks turning more and more into sourdough as the days pass.
 When you are ready to bake the bread, flour a board, moisten your hands to prevent the dough from sticking, and scoop the  dough onto the board.
 Fold the dough over into a four corner package shape.
Flour a clean cotton dishcloth.
Rub the flour in well and then pick up the dough and gently lay it smooth side facing up on the dishcloth.
 Place the dishcloth and the dough in a tall bowl. This helps things keep their shape.

Cover the bowl loosely and let it rise again for another 2 hours.
One hour and 30 minutes into the rise, place the La cloche, both top and bottom, or a pizza stone, into the middle rack of a cold oven. Turn the oven on to 450 degrees.
 After the oven comes up to speed, let the stone or the La Cloche heat for at least another 30 minutes. You want every thing hot, hot, hot.
 When the bread is ready to go into the oven, take the lid off the la Cloche and dump the dough into the bottom half.

Put the lid on the la Cloche. If you are using a pizza stone, scatter some coarse corn meal on the stone before the bread dough goes on it to prevent sticking. You don't have to do this with the La Cloche.
 If you are using a pizza stone, put a pan of hot water under the bread as it bakes. This provides the proper moisture in the oven. 

 Bake for 30 minutes with the lid on,  then remove the lid and bake for an additonal 15 to 20 minutes until the bread is crisp and done.
When the bread comes out of the oven, take it out of the pan and place it on a cooling rack for at least an hour. Put your ear to the bread, you should hear a faint cracking noise. That's  not in your head...that's the bread "singing" to you, a sign of a perfect crust.

  I had baked a loaf of this bread a few days before and taken it with us to our weekly Farmers Market Picnic, along with some Cypress Grove Chevre and a good local white cheddar from Petaluma Creamery.


  While we were sitting on the grass enjoying the fine summer evening with friends, someone asked where they could get this bread they were eating. They thought I had bought it at the market. Wow!

   So there it is, non kneading, easy artisan bread. Believe me, I am no baker but I am now totally stoked about this bread and this method. Whether you bake it in a clay pot or a cast iron dutch oven or on a pizza stone, The Big Secret is using the best flour you can get your hands on. The other upside to this: Paula let me keep the Cloche..she knows an addict when she sees one.
    Coming up next, I go all Mughlai on some Eggplant. Follow along on Twitter @kathygori 

Wednesday, October 6, 2010

PFB Round #3 Luxury Dinner Recipe, Stuffed Poppadoms! Easy Elegance. Also, Last Day To Vote!

Channeling The Inner Burra Memsahib
   Voting ends on Thursday Oct. 7th at 6:00 PM for Project Food Blog Round #3, The Luxury Dinner. I've been well and truly impressed by all the elegance out there. Who knew that we Kitchen Gophers can be so classy when duty calls!
  I've seen everything from the good wedding china to casual crockery, fancy crystal to simple stemware, sterling silver to ivory chopsticks. And the dinners have taken me on a round-the-world journey. It's been fun seeing what everyone has been up to. Believe me, the competition is stiff I tell you, stiff!
    My Goan dinner, while not exactly this...
  ..still took work and was fun to prepare.
   
   I hope that my entry has been worthy of your vote. If it has, please give me a boost up the challenge ladder Here. Thanks in advance.
  One of the things that I'm not much used to doing was something that I felt I really, really needed to do for this challenge, and that is prepare an appetizer.
   Most of the time when I prepare an Indian feast, I serve on a Thali where all the dishes are presented at the same time. But I thought since I was channeling my inner Burra Memsahib, an appetizer would be in order. There had been a recipe in Atul Kochhars Cookbook Indian Essence, that I'd always wanted to do, and this seemed the perfect opportunity. 

Stuffed Poppadoms.
 The thing I absolutely love, love, love about this recipe is the stuffing. Actually that's the main part of the recipe, the only thing you actually have to make. The pappads are store-bought and used as the wrapping. So what's in this amazing stuffing? All the good stuff. First, boil and chop 2/3 cup of potatoes.                                                        
 Set them aside.
In a deep skillet or kadhai heat :
 1 Tbs of vegetable oil
When it's hot toss in :
 1 large onion
 1 tsp of shallot
 1 tsp of ginger
 all finely chopped.
 Add in 1 tsp of ground black pepper.
 Stir fry it up until the onions and the shallot and ginger are nice and soft.
 Then add in :
 1/4 tsp ground coriander
 1/2 tsp of turmeric
7 oz of chopped raw shrimp either fresh or frozen.
 Saute it for about 3 or 4 minutes.
  Now add in the potatoes you boiled and chopped earlier along with:
 1 Tbs of lemon juice
 1/2 tsp of salt
 Sprinkle everything with:
 2 Tbs of chopped cilantro
ground cinnamon to taste.
 That's it. Fabulous, luxurious stuffing.
   Putting it Together

   Soak the store bought pappads in warm water for 5 or 10 minutes to soften them. Then drain them.
 In a small bowl mix a bit of flour and water to form a paste.
 Flatten the pappads.
 Put some of the shrimp mixture into one side of the pappad and then roll them up. Seal them closed with the flour and water paste.
  Cooking
    In a deep skillet or kadhai heat oil for deep frying. When the oil is about 320 degrees, deep-fry the pappads for about 2 to 3 minutes until they're crisp. 
Take them out, drain them on paper towels and serve them hot with a bit of chutney.
   I mixed a light salad of watercress and baby arugula with a bit of chopped shallot, then dressed it in lime juice and salt.
   You can see the finished product on the little plate next to the Thali.
   Now about that stuffing. I love it. I cannot tell you what happened to the extra that didn't fit into the pappads because it isn't a pretty story and involves something one never saw Julia Child or any Burra Memsahib worth her salt doing, and that is eating directly out of the bowl with a wooden spoon while standing over the sink. Okay, there I said it. I'm not ashamed I eat over the sink sometimes like a furtive raccoon. Of course I'm not as bad as some people.

A final word about Project Food Blog
I made it to Round 3 in the Project Foodbuzz Foodblogger of The Year Competition. 
     So for anyone who hasn't heard about this before, what exactly is this Project Foodblog Contest and why do I want it so badly???
     Project Food Blog is the first-ever interactive competition where thousands of Foodbuzz Featured    Publishers are competing in a series of culinary blogging challenges for the chance to advance and a  shot at the ultimate prize: $10,000 and a special feature on Foodbuzz.com for one year
     Voting is now open  until the 7th and I'm trying to make the cut to the next round. Please register to vote on Foodbuzz.com (it's free!) or if you're already a member, do me a solid,  Click  Here and give me a vote and help me make it to the next round.

Friday, June 18, 2010

Killer Flatbread and a Lakers NBA Victory Party!!


   It was crazy times last night at our house. The LA Lakers were going up against the dreaded Boston Celtics for the NBA championship. I had planned an evening of flatbread based on a fabulous recipe courtesy of Vegetable Matter. Pizza was the rule since the Lakers lost when I'd served Indian food and had only won on Pizza nights. Follow the Vegetable Matters' link that will take you to a recipe that includes chard, spinach, currants, toasted pinenuts and ricotta salata cheese. It is a fabulous recipe plain and simple. I can't wait to make it again. My only change was I didn't use kale as I had a ton of chard and spinach that needed eating. It was delicious anyway.
    As for the recipe for the flatbread part. I mixed 3 cups of flour, 1/4 tsp of dry yeast, 1 tsp of kosher salt, about 1 and 1/2 cup of warm water and mixed them together. I mixed it well and set it covered in a warm place for 24 hours. If this looks familiar it should. This is the basic New York Times recipe for no knead artisan bread that's been making the rounds of the internet. This batch of dough will make 2 nine inch pizzas.
   If you don't want to or can't use it right away, it will keep in the fridge for about 2 weeks. It also freezes extremely well. Bag it and shove it in the freezer. When you're ready just take it out, let it thaw and Boom! You're pizza baby! The only "work" that needs to be done to make this pizza stone-ready is to add a bit more flour as you're forming it into rounds. The put it out for a second 40 minute rise before baking. That's it. If you've got kids who like pizza, this is your ticket to easy, fast pie nights.

  We were concerned we might not have enough good juju going into this game, so our friend Chip brought his Kobe Autograph Ball once again as our lucky totem. In fact he forgot it and midway to our house went back to get it. I'm so glad he did as it was the mojo we needed.

 His wife Terri baked some insanely good oatmeal, dark chocolate, cherry, almond cookies!!!
 The frantic and fast action on the court was matched in the living room when Patsy met Gracie, the 5 month old Lab puppy who we'd heard beforehand was a die hard Celtics fan. Patsy was determined to change her mind.

     The two of them met outside on their leashes in our driveway and then walked inside together. Proper dog etiquette, the canine equivalent of a jump ball. From there it was off to the races as the two of them wrestled and chased each other around the furniture and through the house for the entire game. It took two peanut butter stuffed kongs to settle them down.
     We whooped and hollered and the Lakers won and it was dog cookies all around. My excitement got the better of me and I attempted a tricky move, feeding two dogs two cookies at the same time."Look Ma, no hands!"
 
   So Basketball season is officially over, and it's back to normal, or as normal as it gets around here. Tomorrow..a nifty new way (for me) to do green beans. Whee!

Tuesday, June 8, 2010

Sanjanas' Soup and Naan Bread Made Easy!


I am a happy camper this evening. Happy because finally after months of cold weather and rain we were able to put our dining tent up on the deck. We love the dining tent and so do our friends. Our house has 1800 square feet of deck. That's a lot of deck and it's a shame not to use it. So use it we do. Our property is also fairly wild with a winter creek and there are lots of bees during the day and mosquitos in the evening who are only too curious about what we're eating. That's why we got the tent.

So we had our first summer lunch outside today and what better way to start the season off than with Sanjanas' wonderful Gujarati-Style Mango Buttermilk Kadhi.
  Sanjana if you don't know her, writes a wonderful food blog called KO Rasoi, and I always find tempting delights and a lot of inspiration there. The minute I saw her wonderful soup recipe, I knew I had to make it.
I've highlighted and linked to her website for the recipe which is simple, quick and easy to make. Sanjana serves the soup hot, I had it hot and it was amazing. I served it chilled and it was fabulous.

To go along with the soup, I served several other dishes. I also baked naan bread. I don't bake naan too often, mainly because I have very poor self control when it comes to naan bread. However, we had company this afternoon and of course sacrifices had to be made in the name of hospitality.
  Naan is pretty easy to make. That's part of the problem. It's too easy. Also, it's too delicious. The naan bread recipe that I've used for 20 years comes from Madhur Jaffrey. There are other recipes out there but for me, hers is the gold standard. It just works.
 The other thing about making naan bread at home that helps, is having a pizza stone . Heat that stone up, slap the naan  down on it in 3 minutes...you're eating naan bread baby!

  Here's how it goes.
  Start off with flour!
  Unbleached all purpose flour.
 In a bowl heat 2/3 of a cup of milk add in:
1 tsp of sugar
2 tsp of dry yeast
Stir it all together  then set it aside in a warm place for about 15 minutes or until it begins to bubble and get a bit frothy.
Meanwhile, in a large bowl mix together:
3 and 3/4 cups of flour
1/2 tsp of salt
1 tsp of sugar
1 tsp of baking powder
2 tbs of vegetable oil

2/3 cup of plain yogurt, whipped a bit

1 slightly beaten egg.
  When  the milk, yeast, sugar mixture is foamy, blend it into the rest.

Put your dough onto a work surface and knead it for about 10 minutes.

Put a bit of vegetable oil in the bowl and roll your dough into a ball. Put some plastic wrap over the top of the bowl and stash it in a warm place for at least an hour. The dough will double in size.
 Meanwhile place your oven rack on the top place in the oven and pre-heat it to 500 degrees. If you're using a pizza stone, place it in the oven before you turn it on so it gets nice and hot. If you're using a regular baking sheet, use a heavy one.
When your dough  is HUGE....Punch it down. Break it off into about 6 separate balls.
Scatter some flour on a surface.

Roll each ball into a tear drop shape.
Place your naan breads on the hot pizza stone and carefully slide them into the oven and bake
them for about three minutes or so.
They'll puff up and brown.

Alan was delighted to be eating out on the deck again.


This recipe for naan makes 6 breads. Of course things can be added to your naan, onion, garlic,black onion seed. You're the naan boss. If you can't finish all your naan (fat chance!) the dough also freezes wonderfully for another day.

The rest of the Meatless Monday recipes are coming, but as a teaser can anyone guess what this is??????
  I have to add again that my 1 year Blogiversary is coming up and I'm having a Giveaway!
About my Giveaway
 As I mentioned before, our 1st Blogiversary is approaching and the people at Early Morning Pottery have given me 2 of their wonderful ceramic Chicken Cookers, and 1 set of Game Hen Cookers to give away in celebration. The rules are simple:
 Rule 1
 On Your Blog:  Post about The Colors Of Indian Cooking and this contest on your blog
or
 On Twitter: Tweet about The Colors Of Indian Cooking. (Include @kathygori in your Tweet)
or
 On Facebook: Become a Fan of The Colors Of Indian Cooking Facebook Page here and talk about it on your Facebook status.
or
   Become a follower of The Colors Of Indian Cooking
or
  Follow @kathygori on Twitter
 Rule 2
  Leave a comment on this blog with a link to your activity.
  That's it.
 Winners will be chose at random on June 14th .
 Good luck!

LinkWithin

Blog Widget by LinkWithin