Sunday, September 22, 2013

Vegetables Go Old School. Carrots, Fingerlings and Chanterelles Cooked In Hay With Seaweed Pesto

   
   One of the things that has always intrigued me about cooking has been how people have come to cook the things they do, and the methods they use to cook them. Maybe it comes from growing up with a lot of defrosting and can opening but I always thought from an early age that cooking should involve something a bit more interesting than watching something rotate in a little box. When I did my recent research into Danish Cuisine, I found a cooking method that was very ancient and also in its own way led me right back to Indian food. Who knew?

   I'm talking about cooking in hay. Haybox cooking is sort of the original crock pot. It involves heating up what one wants to cook, then placing the hot pot, into a box packed with hay, putting a lid on things and then letting the food cook slowly. This is a method of cooking that preserves fuel, a lot of intense labor, and water. It's been used all over the world for ages. It's still being used in India.
 
   Rumor has it that this method of cooking originated in Scandinavia which is where I ran across it in my investigation of Danish cuisine. The restaurant noma features dishes cooked in hay such as these quail eggs.


Other things can be cooked in hay also as I discovered. So I set off to see what I could do with some vegetables, carrots in particular, and I fell in love with the results. This is one of the easiest and delicious ways to cook vegetables, plus it's also fun. All you need is a sturdy pot and a pet store that sells hamster food. It doesn't get simpler than that, or weirder. I'll get to the seaweed later.

Carrots, Fingerlings, and Chanterelle Mushrooms Cooked In Hay With Seaweed Pesto


Here's What You Need:

2  small carrots per person
3 fingerling potatoes per person
2 oz dried Chanterelle mushrooms
A package of clean alfalfa, the sort used for food for hamsters, rabbits and other small varmints.
2 Tbs salt
1 qt water

1 cup of dried seaweed. Toasted nori sheets  used for sushi are just fine and easy to get in most markets.
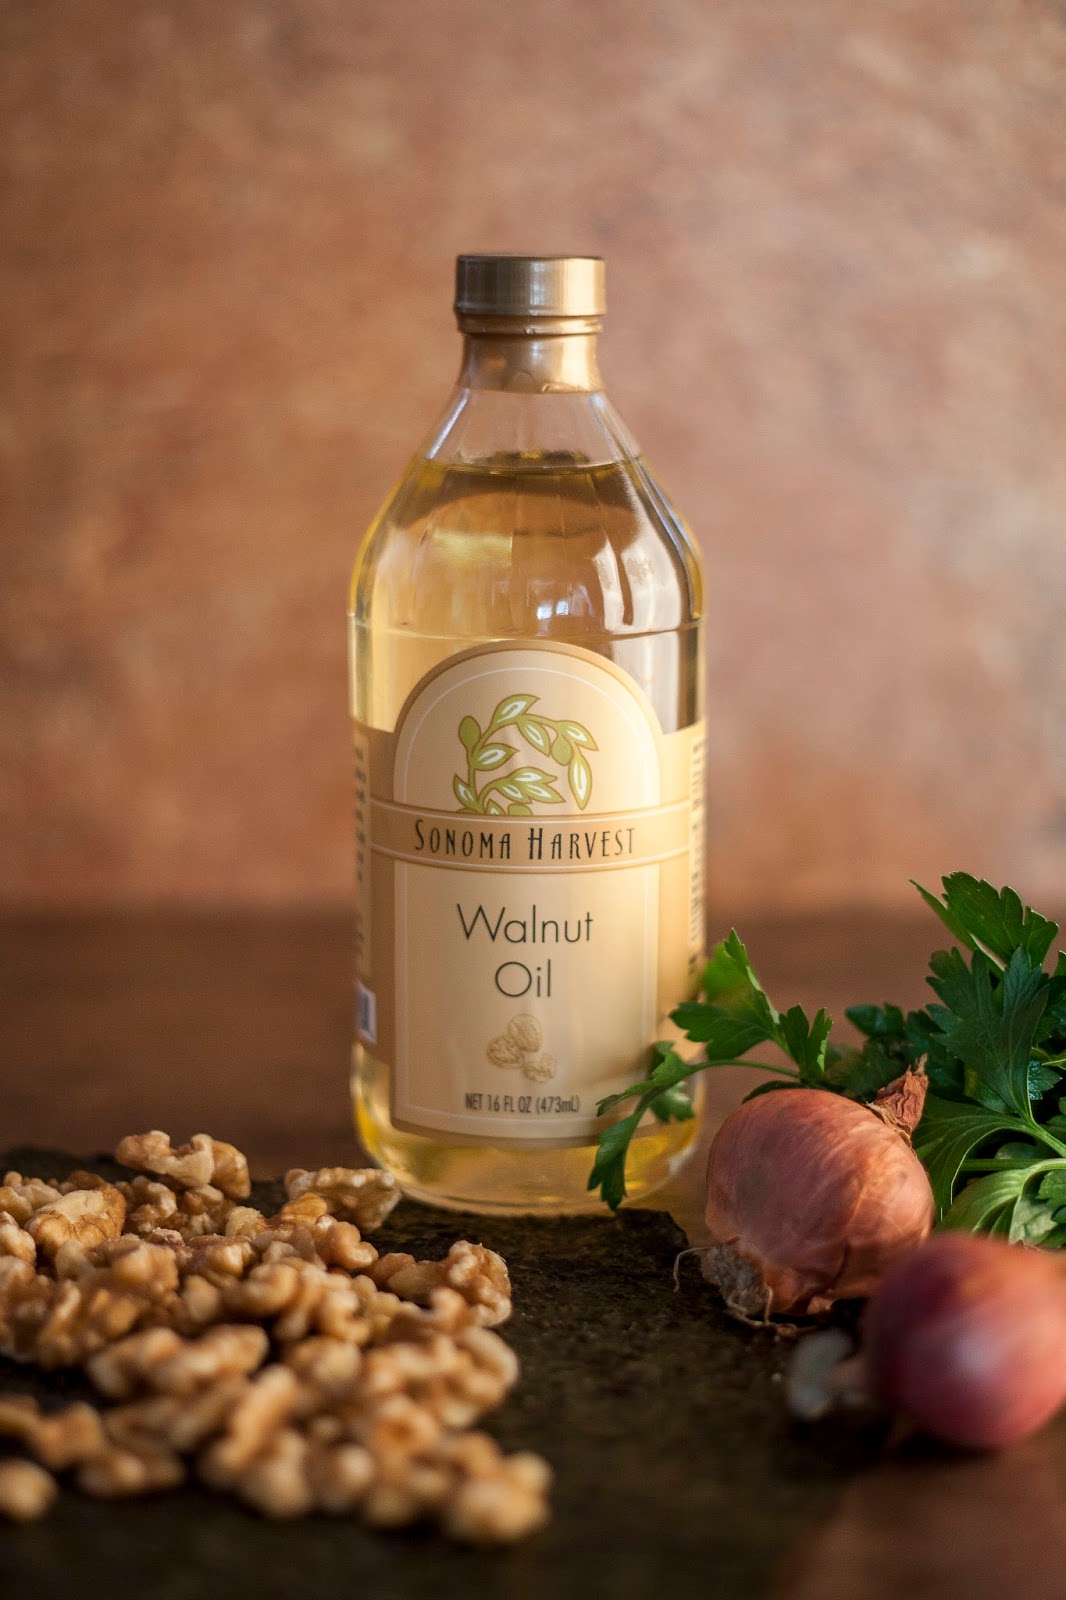
1/2 cup of walnuts
walnut, hazelnut, or olive oil
1/2 Tbs of lemon juice
2 large shallots chopped.

Here's What To Do:

Preheat the oven to 375 degrees
Wash and dry the carrots and fingerling potatoes.


Use organic vegetables for this recipe as you will not be peeling them. Small carrots are the best as they cook easily. Leave the tops on them but cut them down a bit.
Set the vegetables aside.
Soak the Chanterelle mushrooms in hot water for about 20 minutes until they're hydrated.
Fill a dutch oven or heavy oven-worthy pot, ( I used cast iron) with clean fresh alfalfa.


The reason for using hamster fodder is for cleanliness. Anything that is clean enough for animal fodder is clean enough for cooking purposes. Don't just go out to the barnyard, field, etc looking for hay. Clean fresh hay is what you need.
Place the hay in the bottom of the pot.
Wrap the cleaned and dried vegetables in cheesecloth.

Place the cheesecloth bundle on top of the hay in the pot.


Place more hay on top of the cheesecloth.


Light the edges of the hay so they smolder a bit. DO NOT set it on fire.

When the hay smokes a bit, pour 1 qt of water mixed with 2 Tbs of salt over the hay.


Put the lid on the pot, and pop it into the oven for about 40 minutes.
While the vegetables are cooking, make the seaweed pesto.


Tear the seaweed into pieces and soak it in water for about 1 minute to hydrate it.


Place the seaweed, the chopped shallots and walnuts into the bowl of a food processor.


Pulse the food processor.


When you have a rough paste add in the oil.


You'll have to eyeball this to get the right proportion of smoothness. I added in about 1/4 cup of oil
You may want more.
Add in a bit of lemon juice for tartness.


Blend the mixture by pulsing.


Taste test your pesto. When you're happy with the results, set it aside.
When the vegetables are done take the lid off of the pot.

The carrots and potatoes should be fork tender.
Lift the cheesecloth bundle out of the pot, and remove the vegetables.


Season them with a bit of sea salt  if you wish.
Put them on a plate, 2 small carrots, 2 fingering potatoes and a few of the Chanterelles  per person.
Drizzle the seaweed pesto over the vegetables and serve them up.

   Cooked this way the vegetables are naturally sweet and tender and perfumed lightly with the fragrance of the hay. I served these carrots and potatoes as a single course in a multi-course meal. If you're looking for a way to truly experience the freshness of the season's vegetables, give this a try, plus cooking in hay is a fun novel way of cooking that you might just make a kitchen habit. I have a hot of hay left over, so I'm going to be doing a lot more experimenting with hay and seeing how it can be used in my kitchen with Indian cuisine... either that or I'm getting a hamster.

   Coming up next, things get fishy with scallops, follow along on Twitter @kathygori

Monday, September 16, 2013

Easy, Cheesy Puffs. Blue Cheese Gougéres

 
   When I put my Danish Dinner menu together a few weeks ago for the North Festival, the template I used was the menu of the renowned Copenhagen restaurant noma. I set out to present a truly fancy dinner in the New Danish style, and what fancy dinner would be complete without Gougéres? Okay, let me run that back a moment. Up until a few months ago I'd never heard/seen/eaten a gougére. Then we ate at the French Laundry and there on my plate was a small puffy, cheesy bite of delicious. This was a  Gruyere Gougére, and a fine one at that. Since one of the founders of noma  René Redzepi, worked for a while under Thomas Keller at  the French Laundry I thought surely a gougére would be in order. And since I'd received some amazing Danish Blue Cheese from the nice people at Castello I thought it would be perfect to use in my gougére recipe.
  
   A gougére is a small choux pastry, basically a savory cream puff. My track record with cream puffs however is historically terrible. My kitchen life is strewn with cream puff disasters. Choux pastry has never been my friend, however I stumbled across a recipe that I was damn lucky to find. It seemed to be so clear and straight forward that one could hardly muck it up too badly. These treats don't take long to make and can really pep up a simple soup or class up an ordinary drinks party.


Blue Cheese Gougéres


Here's What You Need:

1/4 cup dry white wine
1/4 cup of water
1/2 stick of unsalted butter cut into cubes
3/4 tsp of ground black pepper
1/4 tsp kosher salt
2/3 cup of all purpose flour
3 eggs at room temperature
1/3 cup of crumbled Castello Danish Blue Cheese

Here's What To Do:

Preheat the oven to 375 degrees.
Line a cookie sheet with parchment paper or a silicone baking mat.
Mix together the wine, water, butter, pepper and salt in a medium sized saucepan or skillet.

Bring this to a boil over medium heat. Keep stirring until the butter has melted.
Turn down the heat and stir the flour in the pan.


Stir this together well until the four forms large clumps and starts to stick to the bottom of the pan.
This takes about 1 minute.


Take the pan off the heat and let it all rest for about 5 minutes.
While the pan is cooling, whisk the eggs together in a small bowl. Set 1 Tbs of the beaten egg aside for brushing on the gougéres.
After 5 minutes have passed mix 1/3 of the beaten egg into the dough.


When it's fully incorporated into the dough, add the next 1/3 and so on until all the egg is used up.
The dough will be thick and sticky.
When all the egg is in the dough, add in the crumbled blue cheese.


Mix it in well.
Drop the dough by spoonfuls onto the baking sheet. Hint: brush the spoons with a bit of oil or non stick spray it will make this a whole lot easier.
You should have about 24 walnut sized gougéres.


Use a pastry brush and brush the beaten egg onto the gougéres. Round off any pointed tops.


Pop them into the oven and bake them for about 30 minutes. They will be puffed, golden brown and dry when they're done. They should feel firm to the touch.
Serve these little babies hot and crispy from the oven. I added them as a side to a cold apple carrot soup  from a recipe by Claus Meyer the other founder of noma.


   So there it is, pastry choux without tears.  I had such a good time making these little puffs I may just take another whack at cream puffs. Coming up next. Hay is not just for the barn, it's the coolest new/old kitchen tool. Follow along on Twitter@kathygori.

Thursday, September 12, 2013

Have A Cookie My Dear. Buckwheat Gluten Free Macarons.


   When I was planning my North Festival menu a few weeks ago, I felt I was doing great until it came to dessert. Cloud Berries? Not hardly. Not around here at least. I was also not about to run across any birch syrup easily. I looked though all the recipes I could find, searching for something that would go along with the various other dishes I'd be serving. My only childhood run-in with a Danish dessert was those tins of Danish Butter cookies my mother would bring home from the dollar store that had a shelf life longer than the half life of uranium. Definitely not those. Then once again, Claus Meyer came to the rescue. The co-founder of the famous restaurant noma saved the day with a recipe that did not require my foraging in the Arctic. He had a very simple cookie, made of humble buckwheat. It spoke to me.


   Buckwheat Macarons sounded like just what I was looking for. Rustic, earthy, not icky sweet and not too much for a dessert after a long meal. Plus, buckwheat, not really being wheat but a fruit seed related to rhubarb and sorrel is gluten free which meant no special dessert for my celiac friends. Something for everybody.

   I have to say here that I have never ever in my life baked a macaron, though I've certainly eaten plenty of them. One of my very favorite places in Los Angeles where we've whiled away more than a few afternoons, is Jin Patisserie on Abbot Kinney in Venice.


It was always the perfect spot to sugar up before a pitch meeting or console oneself over the vagaries of a Hollywood writers life. They display their macarons in little jewel cases set in the wall. it's like Breakfast at Tiffanys if the breakfast was what was in the window.

   I knew I could never duplicate the pastel colors and perfection of those macarons, but hey, I'd be working in buckwheat!  Buckwheat is all forgiving, buckwheat conceals a thousand errors in the mirror-like surface of normal macarons. My macarons would not be pink or girly, they would be the macarons of Vikings. Odin himself would feel comfortable eating one. At least that's what I told myself. I also figured that what would be a better filling for my macarons than Chocolate Espresso ganache made from CocoaPlanet chocolate. Since the Danes love their coffee it would be a natural fit. I had my work cut out for me.

Buckwheat Macarons With Chocolate Espresso Ganache


Here's What You Need:

1/2 cup buckwheat flour
2 cups of almond meal flour
6 egg whites
1/2 cup of superfine sugar (aks caster sugar)
4 3/4 cups of powdered sugar
8 oz semi sweet chocolate ( I used CocoaPlanet Espresso Chocolate)
1 cup whipping cream
1 Tbs unsalted butter

Here's What To Do:

Preheat the oven to 293 degrees.
Cover a cookie sheet with parchment or a silicone baking mat. Set it aside.
Bring your egg whites to room temperature. Always do that as they whip up better that way.
Put the room-temperature egg whites into a large deep bowl.


Set them aside.
Sift together the buckwheat flour, the powdered sugar and the almond meal flour.


Set it aside.
Whip the egg whites on medium speed until they start to get frothy.


Then gently add in the superfine sugar a bit at a time.


Do this until the egg whites are stiff and glossy.

Fold the buckwheat flour, almond flour and powdered sugar mixture into the egg whites a bit at a time.


Do this carefully.


   Now here is where my macarons go primitive. Most sophisticated macaron makers will pipe their dainty little cookies onto a parchment or silicone covered baking sheet.  Not I. I dropped them onto the cookie sheet in spoonfuls since I am a danger with a pastry bag. Trust me, I'm not kidding around here. You don't want me anywhere near a nozzle.

So drop those macarons on to the cookie sheet while attempting to make them fairly equal in size so they will fit together nicely when you have filled them.

Once the macarons are on the cookie sheet let them sit out at room temperature for about 15 minutes.
Than pop them into the oven for about 15 minutes baking time.


When they are feeling firm to the touch on top and firm on the bottom with those cute little macaron feet, set them on a cooling rack.


 While the macarons are cooling make your ganache.

Chop the chocolate into  small chunks, place them in a heat-proof bowl and set them aside.
Bring the cream to just under a boil on the stove (about 190 degrees.)
Take the hot cream and pour it over the choclate then stir it all together until all the chocolate has melted. Stir in 1 Tbs of unsalted butter.
Mix everything together well and then pop it into the fridge to chill.

Chill the ganache has chilled to a firm and spreadable form. This usually takes a couple of hours, if it gets too firm don't worry just leave it set out for a bit and it will get back to the spreadable stage quickly.
Now it's time to play Match.com with your macarons.
Pair them up  so that you have macarons of equal sizes.


These two look like they'd get along once filled with ganache. I mean. who wouldn't?

When the macarons have cooled and the ganache has gotten spreadable, fill the cookies  and make them into sandwiches. Once filled, the macarons can be stored in an air tight container in the fridge over night to set. Or you can eat them sooner. No one's looking.

   I set my cookies onto small plates and balanced them on polished beach stones because they seemed like some sort of mollusks when I was done with them, and I thought WWCMD? What Would Claus Meyer Do. Yeah, probably not this, but boy those bags of rocks from the dollar store really caught my attention and I don't have an aquarium. Yet. I scattered a few raspberries among the stones for a burst of fresh juicy flavor against the dark chocolate ganache and the buckwheat accent of the macaron. Geeze, I just heard myself there.

   The cookies were good. Damn, they were real good. And I thought I couldn't bake macarons! I had planned on one macaron per person, but that's not how it worked out as the guests went looking for more. We ran out of them days ago and Alan is still  looking hopefully into the fridge and every time some Tupperware pops he thinks he's getting a cookie. Pavlov move over. Coming up next, hay is not just for horses anymore get your lighters and follow along on Twitter @kathygori

Tuesday, September 10, 2013

North Festival, My So-noma Danish Dinner Where I Dish The Dirt. Edible Dirt That is.

 
Sponsored Post

   If you'd asked me a few weeks ago about Danish cuisine, I would have just given you a blank stare. For 23 years I've immersed myself in the cooking of India which is about as far away from Denmark as one can get. Of course I wasn't completely ignorant. A close friend here in Sonoma is a Finn, who spends months back in Lahti every year, and another is a Swede. I know a Danish chef in Los Angeles named Bent who specializes in Panini, and a couple of my friends have made the pilgrimage to NOMA the famous restaurant in Copenhagen that's been rated the best in the world.


   A couple of more friends have shared their memories of walking by the place but that's about as far as my knowledge went. Of course I'd  visited the Danish Village  of Solvang just north of Santa Barbara (on the way to an Indian casino, don't ask) which had led me to believe that Danish cooking was all about the sugar. Also the movie Sideways was filmed there. That and the plastic storks on the roofs.


All of that was blown away the minute I got involved involved in North Festival and really learned about the cuisine of Denmark and all the amazing things going on in the kitchens of the far North.
 
   Danish food has always been about using what one has, eating what's available and preserving what's fresh for use during the long cold winters. Danish food is hearty. They're famous for their dark breads, potato dishes and salted meats and fish, what the Danes call "storage housekeeping." Of course there is the famous "Danish Pastry" and Smorrbrod or open faced sandwiches. But, as it turns out there's a whole lot more to Danish cuisine. Research by Scientists at the University of Copenhagen have found the traditional cuisine to be very healthy. Move over Mediterranean Diet. Meet your new rival, the Nordic Diet.

   One of the leaders of the new Danish food revolution is Chef Claus Meyer, co-founder of restaurant Noma. Studying the foods eaten traditionally before Big Agro got involved, young chefs started experimenting with old recipes and new/old techniques, and lit a fire under the culinary world. So that is where I turned in looking for a pathway to Danish food.

   Living in Sonoma, eating locally raised food is relatively easy. Of course there were certain Danish foods (cloud berries, birch syrup, and spruce tips) which I couldn't lay my hands on, and others that we do have here, but usually much earlier in the year. My weekly trip to our Organic Farmers Market and our local farm shops made a meal easy to come up with. I learned some new and exciting cooking techniques I'm eager to share, but I thought I'd start with one of the dishes that put noma on the map. Edible Dirt.

   In Hollywood no good dinner party goes by without some serious dirt dishing, but what  I wondered, would diners do if they had what appeared to be real dirt waiting for them on their plates? Could I make dirt, and if I did, would they eat it?


Edible Dirt Appetizer

Here's What You Need: 

2 Tbs raisins
1/4 cup of mixed raw nuts  ( I used cashews and walnuts)
1/4 cup raw almonds
5 oz. 2 thin slices of Danish Pumpernickel
1/2 cup crushed Wasa crackers (I used Hearty Wasa)
1 oz dried Porcini mushrooms
2 Tbs dehydrated onions
2 Tbs olive paste (1 1/2  Tbs oil cured dried olives ground up and mixed 1/2 Tbs of plain black olives)
1 Tbs pumpkin seeds
2 Tbs  hazelnut, pumpkin seed, or walnut oil

fresh radishes, green onions , or small carrots
5 oz goat cheese
3 Tbs plain yogurt
1 shallot finely chopped
a handful of  chopped fresh parsley, dill, and mint
kosher salt and pepper to taste

Here's What To Do:

Preheat your oven to 275 degrees
Put the raisins, mixed nuts, almonds and pumpernickle on a cookie sheet. Spread them in a single layer. Bake them in the oven for 30 to 45 minutes. It's done when the bread is crisp on top.


Turn off the oven and leave the cookie sheet with all the ingredients on it in the oven until it's cooled thoroughly. The raisins will dry and harden up.
Roughly chop up the nuts.
Dump the chopped nuts in a food processor along with the pumpkin seeds, Wasa crackers, dried Porcini mushrooms and dried onion. Break the crisp Pumpernickel bread into chunks and toss it in also.


Pulse the food processor until you have a  coarse dirt like mixture.


Add in the olive paste.


Pulse it a bit more until you have something the color and texture of dirt.
Drizzle in a bit of hazelnut, walnut or pumpkin seed oil in.

Pulse it again until you have a nice dark moist looking "soil."
Set your dirt aside.
Place the softened goat cheese in a bowl.
Chop the shallot.


Add it into the softened goat cheese.
Chop the fresh herbs.

Toss them into the goat cheese
Whip this together with the yogurt into a creamy dip. Set it aside.


Set out several small containers. I used unglazed terra cotta 3 inch azalea pots and saucers. They cost me 79 cents apiece.
Place a bit of the goat cheese dressing in the bottom or each little pot.
"Plant" your cleaned and scrubbed vegetables in the dressing.


I used organic radishes, green onions and carrots. Since the carrots were small and organically grown I didn't peel them, but washed them thoroughly.
With a spoon, ladle some dirt over the dressing and around the vegetables.


Your final dish should look like this.


The look on your guests face when told their first course is in the flower pot... priceless.

   Of course, this wasn't the only thing that was served. Once I made edible dirt I couldn't stop there, I had to go the Full Norseman. I never do anything halfway. Here's my menu, all taken from recipes by Danish chef Claus Meyer.


Here's what it looked like on the table.

   Scallops with a blueberry vinaigrette on pea shoots and field greens,  pork tenderloin with pickled raw red cabbage and apples, hay roasted (yes I said hay and I'll show you how) carrots, fingerling potatoes, and chanterelle mushrooms in a seaweed pesto, cold carrot and apple soup with an herb dressing served with Danish Rosenborg Blue Cheese gourgeres, a Blue Cheese and Danish brie blue cheese plate with fresh gleaned local figs, almonds and crispbreads, and finally buckwheat macarons filled with CocoaPlanet espresso chocolate ganache and fresh raspberries.


   Did I mention that I fell in love with Danish food doing this project? Yes I did. I also learned some skills and techniques that I think will carry over to my regular Indian cooking and I'm excited about sharing them. The freshness, the simplicity and the traditional methods used in cooking thoroughly impressed me, as did the use of local and sustainable ingredients. I'll be posting these recipes and how to make them in the next few days. Follow along on Twitter @kathygori plus, you can find out more about it here.

   NORTH Festival

LinkWithin

Blog Widget by LinkWithin